I. WEB
1. The program improves some functions related to Lot/Expiry date and Serial/IMEI
2. The program improves Business report
3. The program adds report to compare sales by time
4. The program adds report on stock transfer
5. The program allows the manager to view sales report by shop
6. The program adds report on Supplier debt details by note and item
7. The program adds the feature Save width and Print report in PDF
8. The program improves numbering rules
II. PC
1. The program allows the cashier to add promotion to the returned item upon exchanging/returning item
2. The program allows to edit Same ship cost
3. The software improves some functions on Order screen (Shipping book)
I. WEB
1. The program improves some functions related to Lot/Expiry date and Serial/IMEI
Details of change:
- Settings: Require to enter Lot/Expiry date of items
Previously, the program does not require to select Lot/Expiry date when adding any note or selling items. , the program requires to enter Lot/Expiry date of items.
Instruction steps:
Step 1: Go to Settings\Purchase/Sale, check “Require to enter Lot/Expiry date of items“
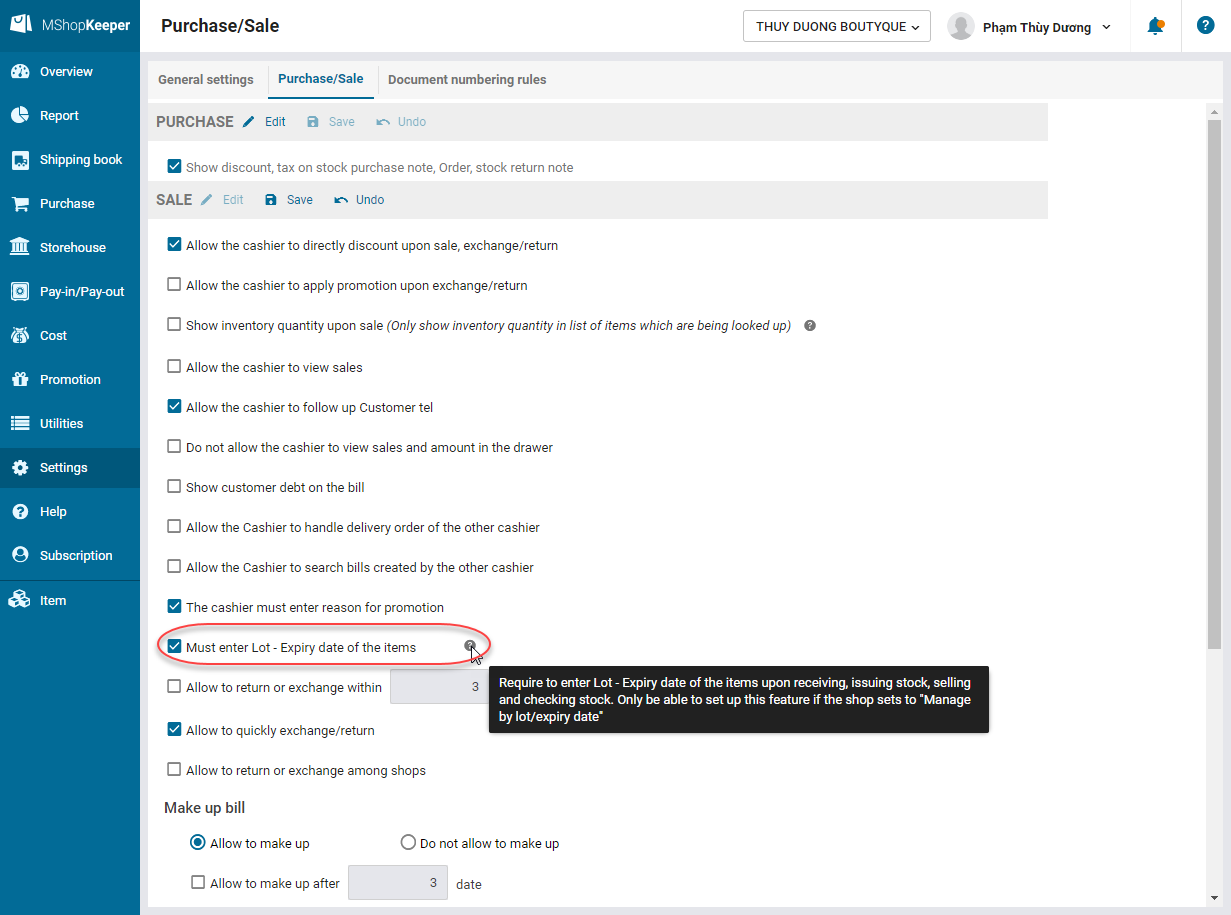
Step 2: Click Save.
After saving settings, when the accountant adds any note or sells item, they are required to enter Lot/Expiry date.
- Scan Serial/IMEI
Details of change: Previously the program does not support scanning Serial/IMEI. , when receiving – issuing – transferring stock, returning purchased items, checking stock managed by Serial/IMEI, the accountant can add item by scanning Serial/IMEI. The cashier can scan Serial/IMEI when selling items.
Instruction steps:
– The accountatnt receiving or issuing stock managed by Serial/IMEI by scanning Serial/IMEI.
Step 1: Add note and select items managed by Serial/IMEI
Step 2: Right click on Serial/IMEI box, scan Serial/IMEI
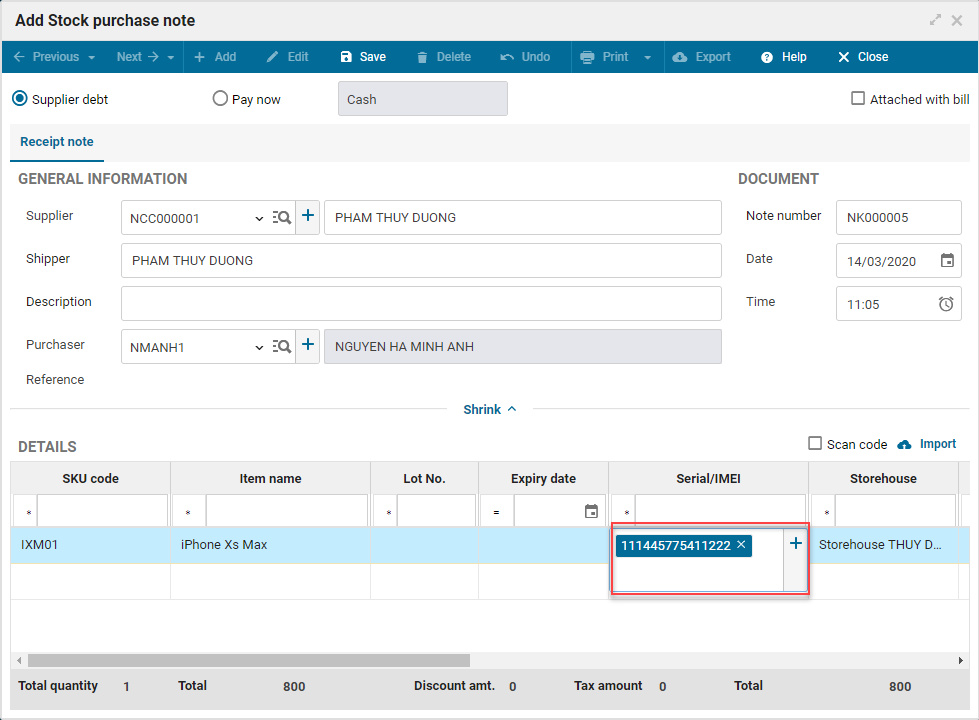
After each scan, the program automatically recognizes 1 more Serial/IMEI and increase quantity by 1.
– The account returns purchased items, transferring stock, checking stock managed by Serial/IMEI
Alternative 1: Follow the same steps as receiving stock
Alternative 2:
Step 1: Add return note / stock issue note / stock transfer note
Step 2: Check Scan code and then scan Serial/IMEI
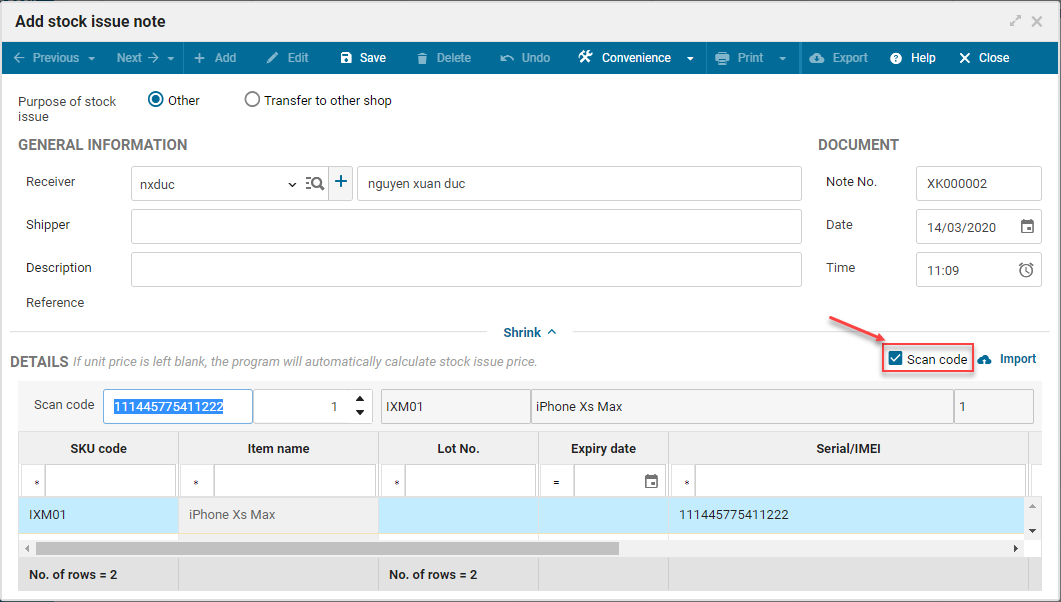
After each scan, if the item is already available in the note, the program will automatically recognize 1 more Serial/IMEI and increase quantity by 1. If the item is not available in the note, the program will automatically add this item.
– The cashier sells items managed by Serial/IMEI
Step 1: Right click on the barcode/SKU code box
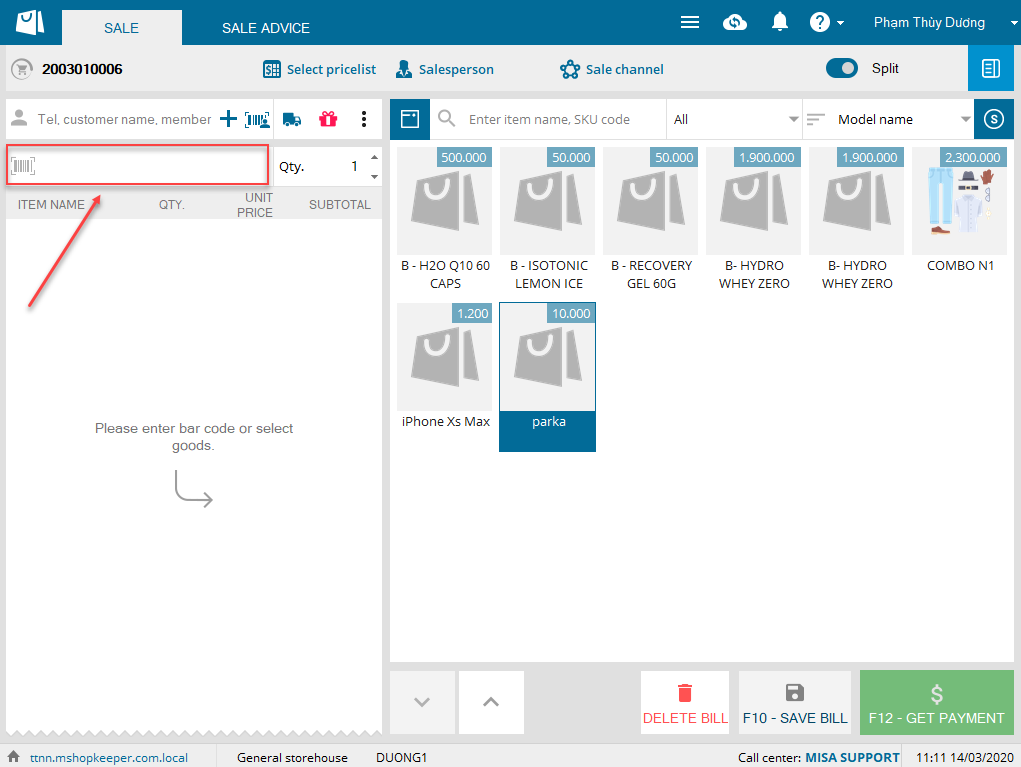
Step 2: Scan Serial/IMEI
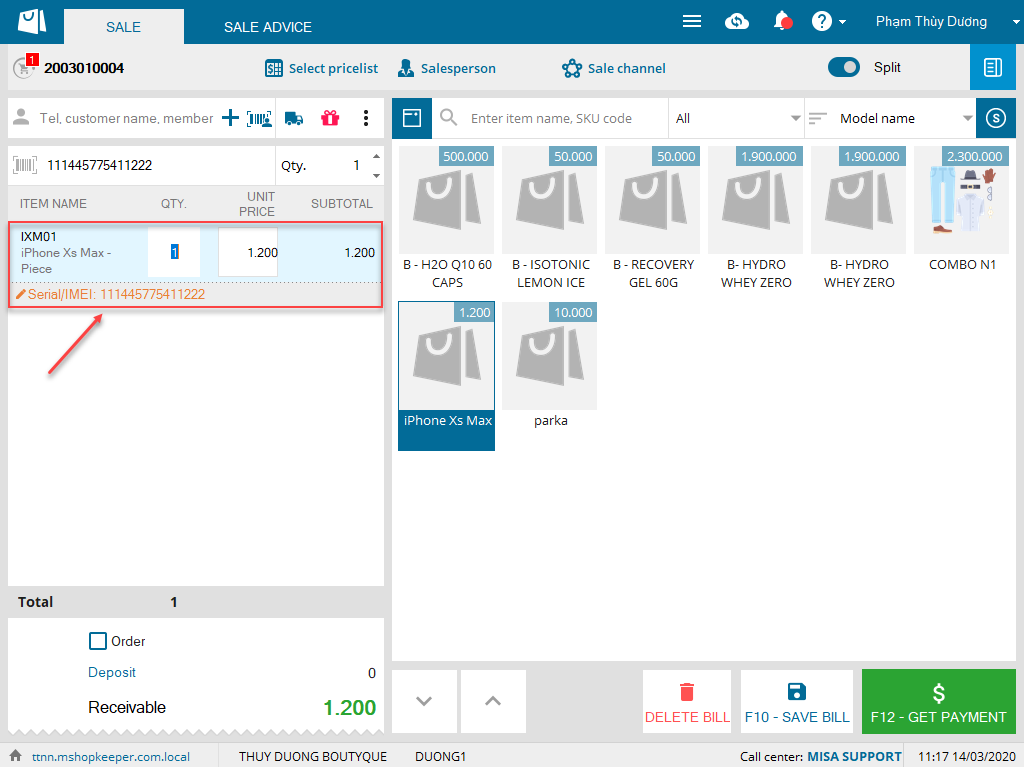
After each scan, if the item is already available in the note, the program will automatically recognize 1 more Serial/IMEI and increase quantity by 1. If the item is not available in the note, the program will automatically add this item.
- Add multiple Serial/IMEIs of the item to the return note, stock issue note, stock transfer note, stock checking note and bill at the same time
Details of change: Previously, when adding Serial/IMEI of the item to the return note, stock issue note, stock transfer note, stock checking note and bill, the cashier/accountant has to select each Serial/IMEI. , the program allows to add multiple Serial/IMEIs to those notes at the same time so that the accountant/cashier can save time.
Instruction steps:
– Add multiple Serial/IMEIs of the item to the note on the management page at the same time
Step 1: Add return note / stock issue note / stock transfer note / stock checking note. Then add 1 item managed by Serial/IMEI to the note.
Step 2: Click onSerial/IMEI box and select the icon 
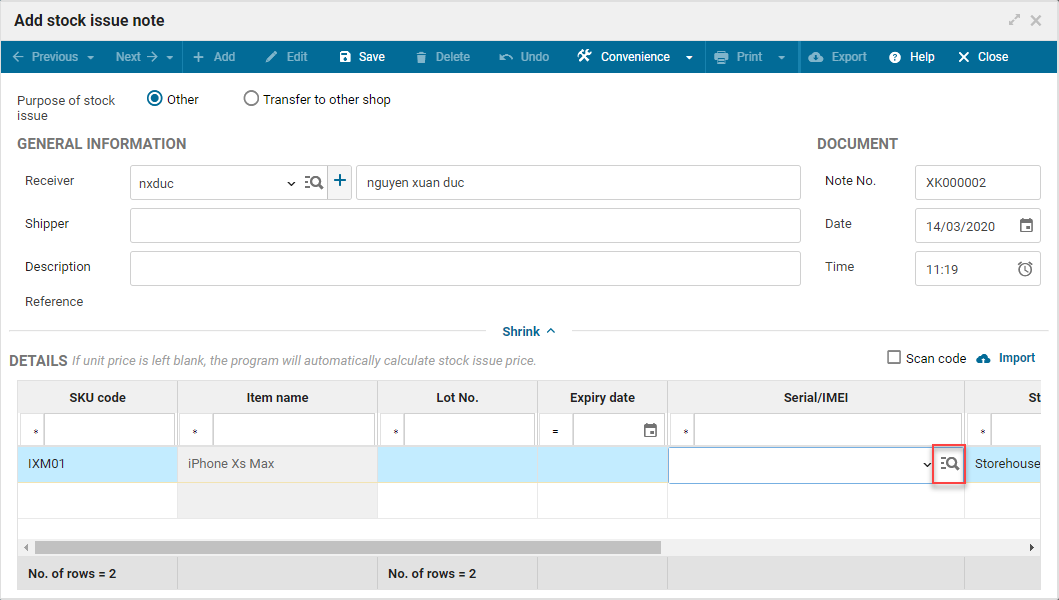
The program shows list of Serial/IMEIs

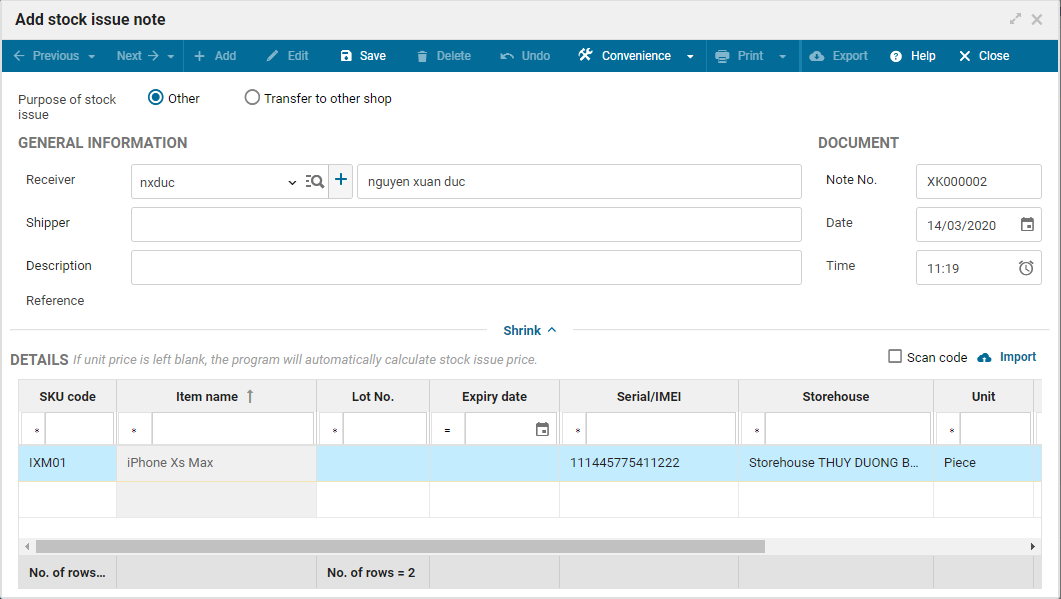
Step 3: Check Serial/IMEIs to be added to the note. Then click Select

After click Select, the program adds selected Serial/IMEI to the Serial/IMEI box of the item and automatically updates quantity.
– Add multiple Serial/IMEIs to the bill at the same time.
Step 1: Select items managed by Serial/IMEI box to the bill. The program will automatically show List of Serial/IMEIs.
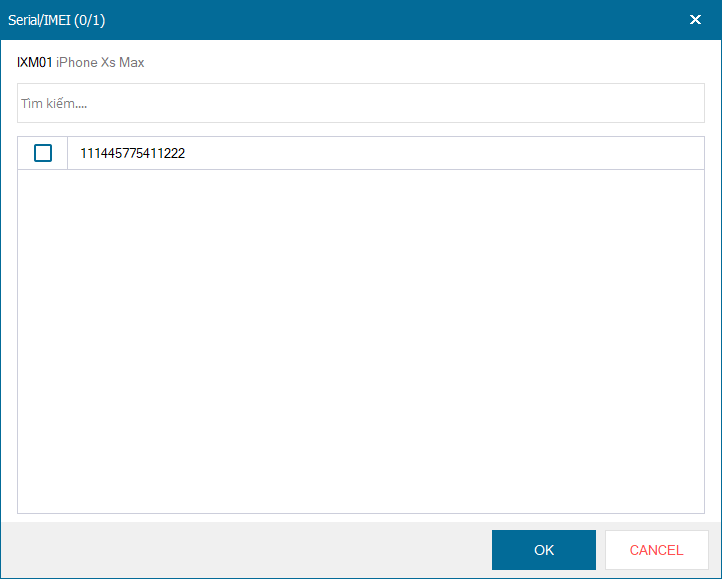
Step 2: Check Serial/IMEIs to be added to the bill. Then click OK.

After click Select, the program adds selected Serial/IMEI to the Serial/IMEI box of the item and automatically updates quantity.
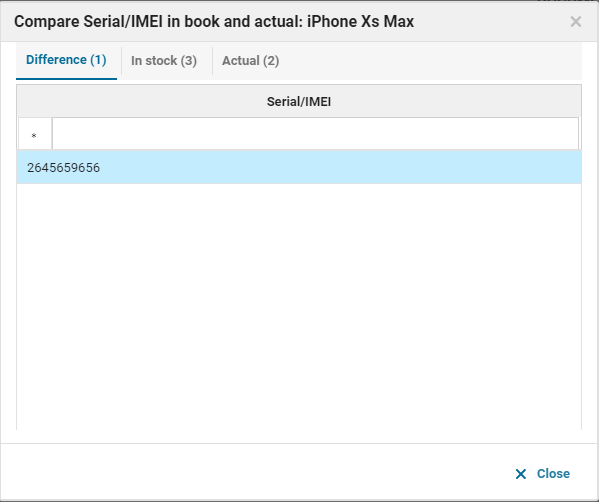
- The stock checking note shows the quantity of Serial/IMEIs in book, actual and difference
Details of change: Previosuly, when checking stock the accountant cannot know detailed difference of Serial/IMEI in book and in fact. , the program adds information on Serial/IMEI in book, actual checked Serial/IMEI and the difference.
Instruction steps:
Step 1: Add a stock checking note, select and add items managed by Serial/IMEI to the note, enter or scan Serial/IMEI and then click Save.
Step 2: Select quantity
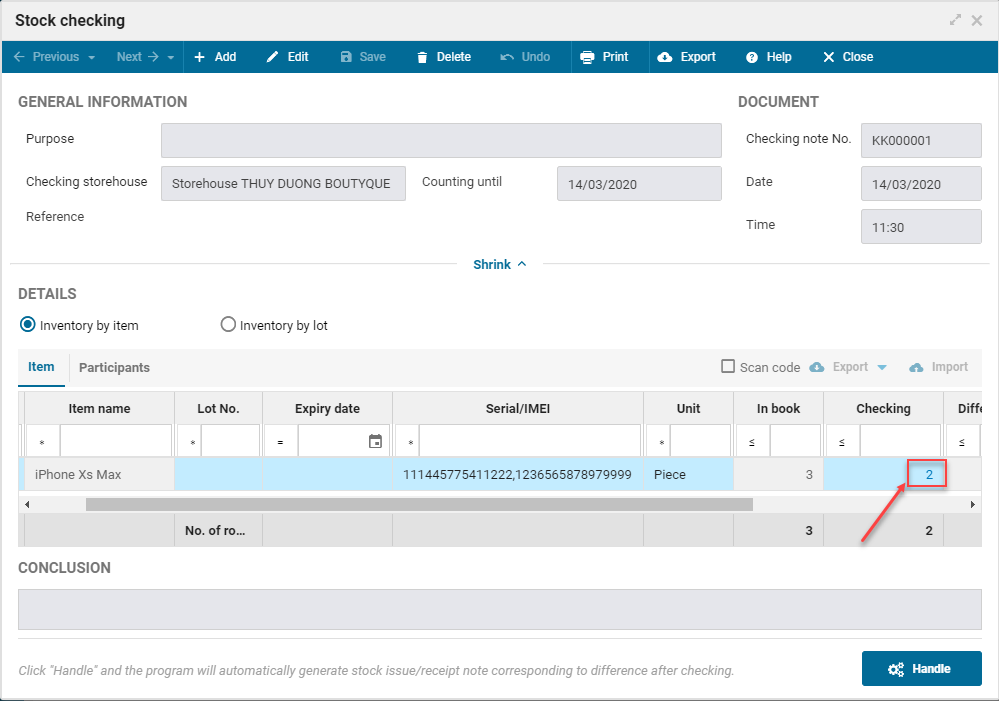
The program shows Serial/IMEI in book, actual checked Serial/IMEI and the difference.
- Show Lot/Expiry date, Serial/IMEI on bill
Details of change: Previously, the program does not show Lot/Expiry date, Serial/IMEI on bill. As of R30, the program will show Lot/Expiry date, Serial/IMEI so that the cashier can quickly check it for return/exchange or warranty.
Instruction steps:
Step 1: On PC Sale, go to Printer settings
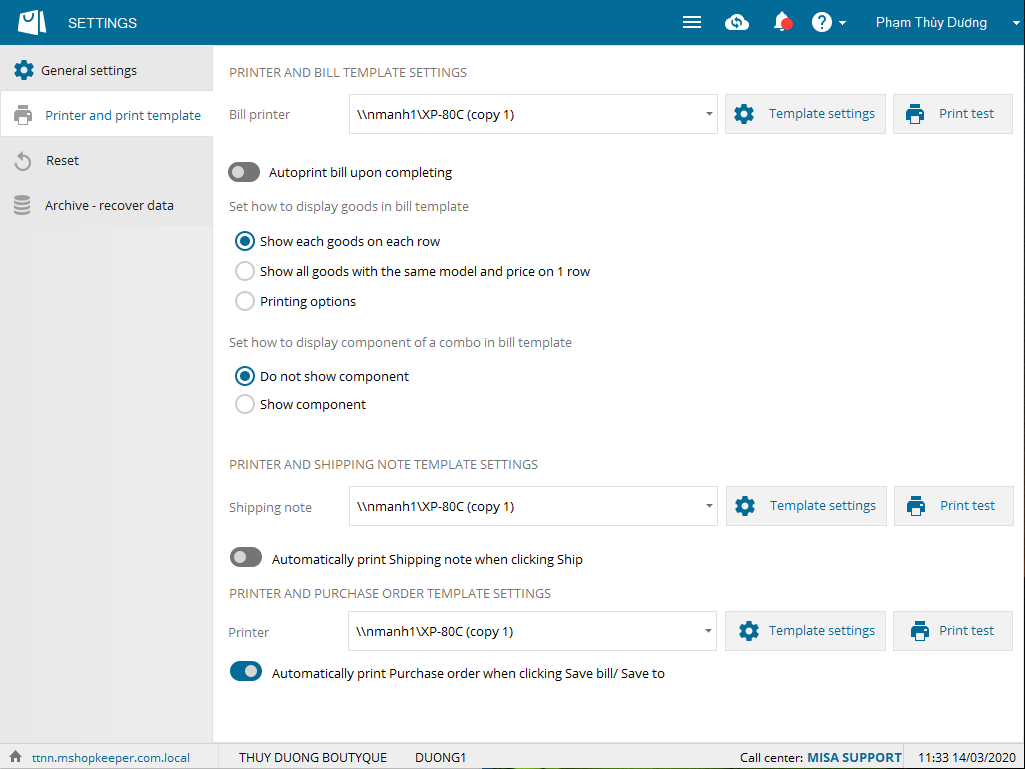
Step 2: Click Custom and on Content tab check Show Lot/Expiry date, Show Serial/IMEI. Then click OK.
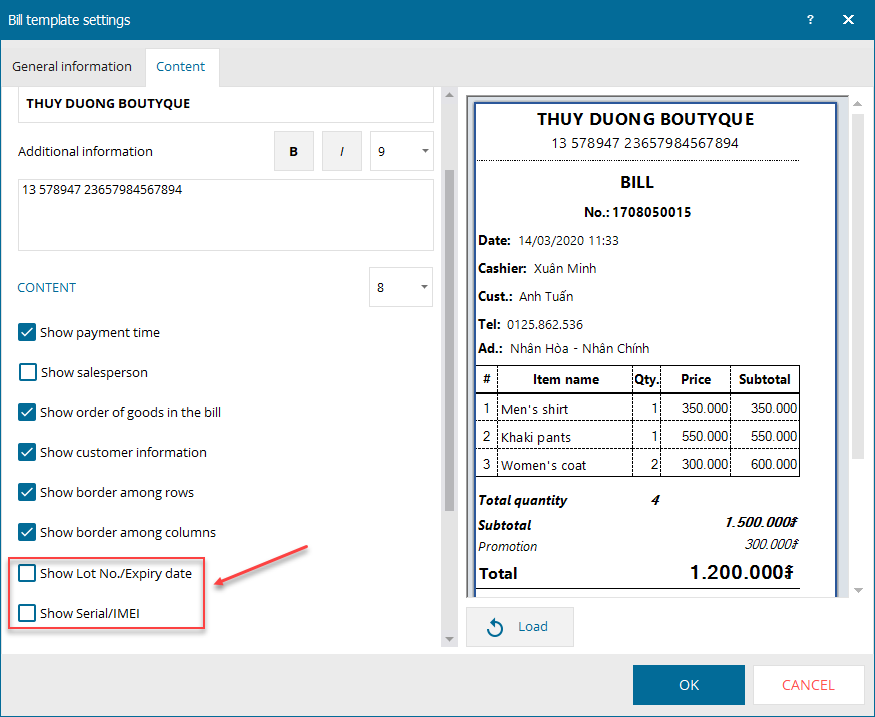
*** Note:
– Set up to show Lot/Expiry date, Serial/IMEI on shipping note the same as for bills.
– Information on Lot/Expiry date, Serial/IMEI always shows in bill details.
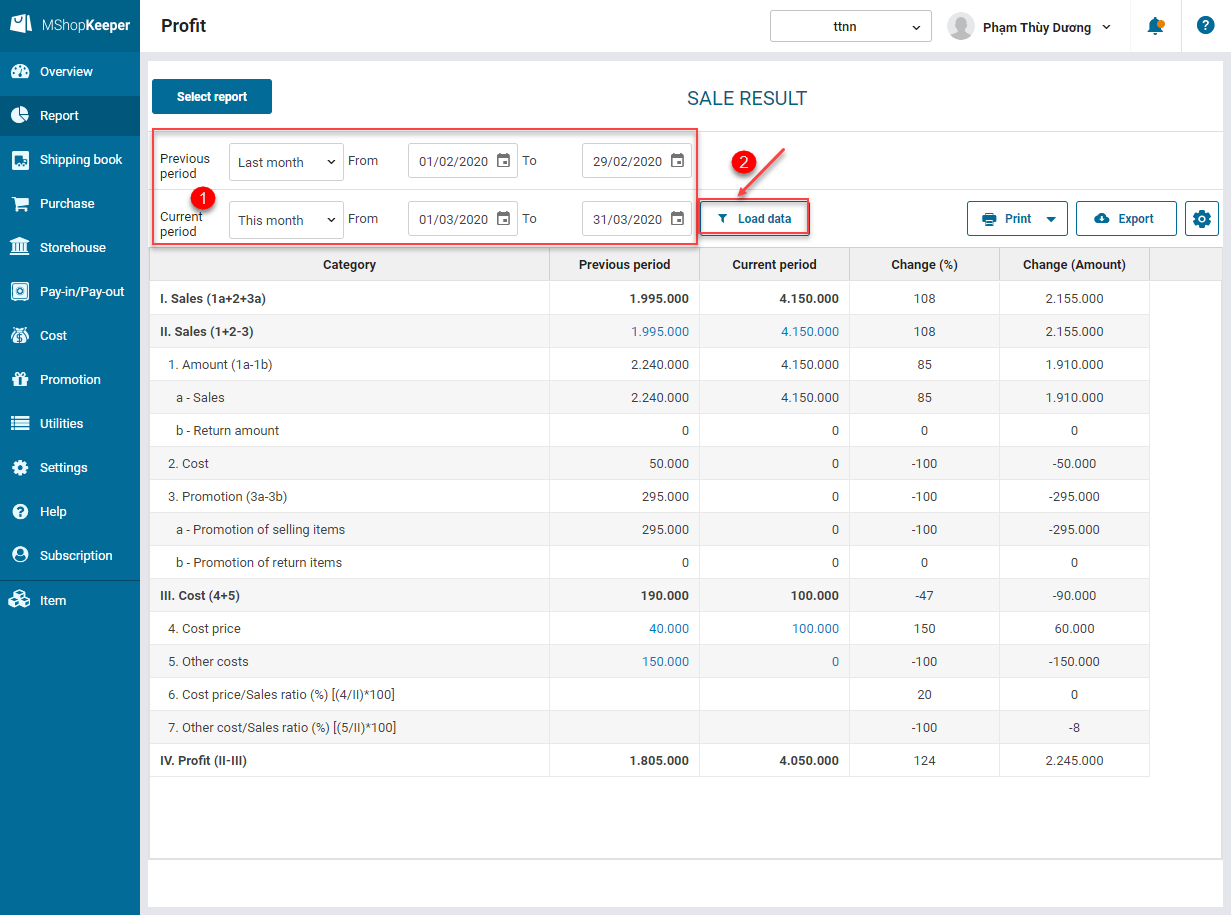
2. The program improves Business report
Details of change: The manager wants to compare sales, costs, profits of the shop among periods so as to make proper business plan. As of R30, the program allows to view report of the previous period, this period.
Instruction:
Step 1: Go to Report\Profit, Business result
Step 2: Select previous and current period to compare sales, costs, profit. Then click Load data
3. The program adds report to compare sales by time
Details of change: The manager wants to follow up sales this period and last period so that they can make purchase plan and promotion plan appropriately. As of R30, the program adds the report to Compare sales by item over time
Instruction steps:
Step 1: Go to Report\Sale
Step 2: Select report Compare sales by item over time
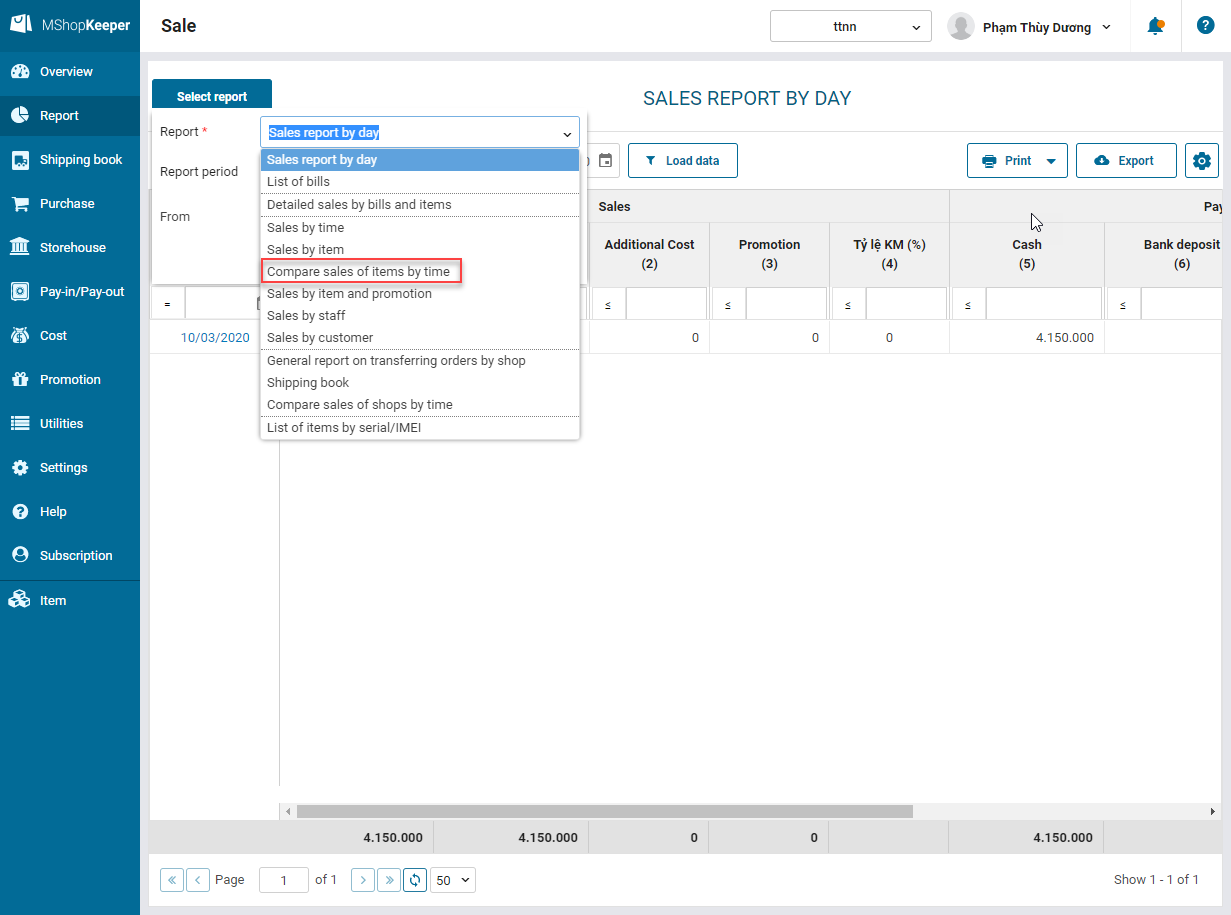
Step 3: Select report period and criteria to view report
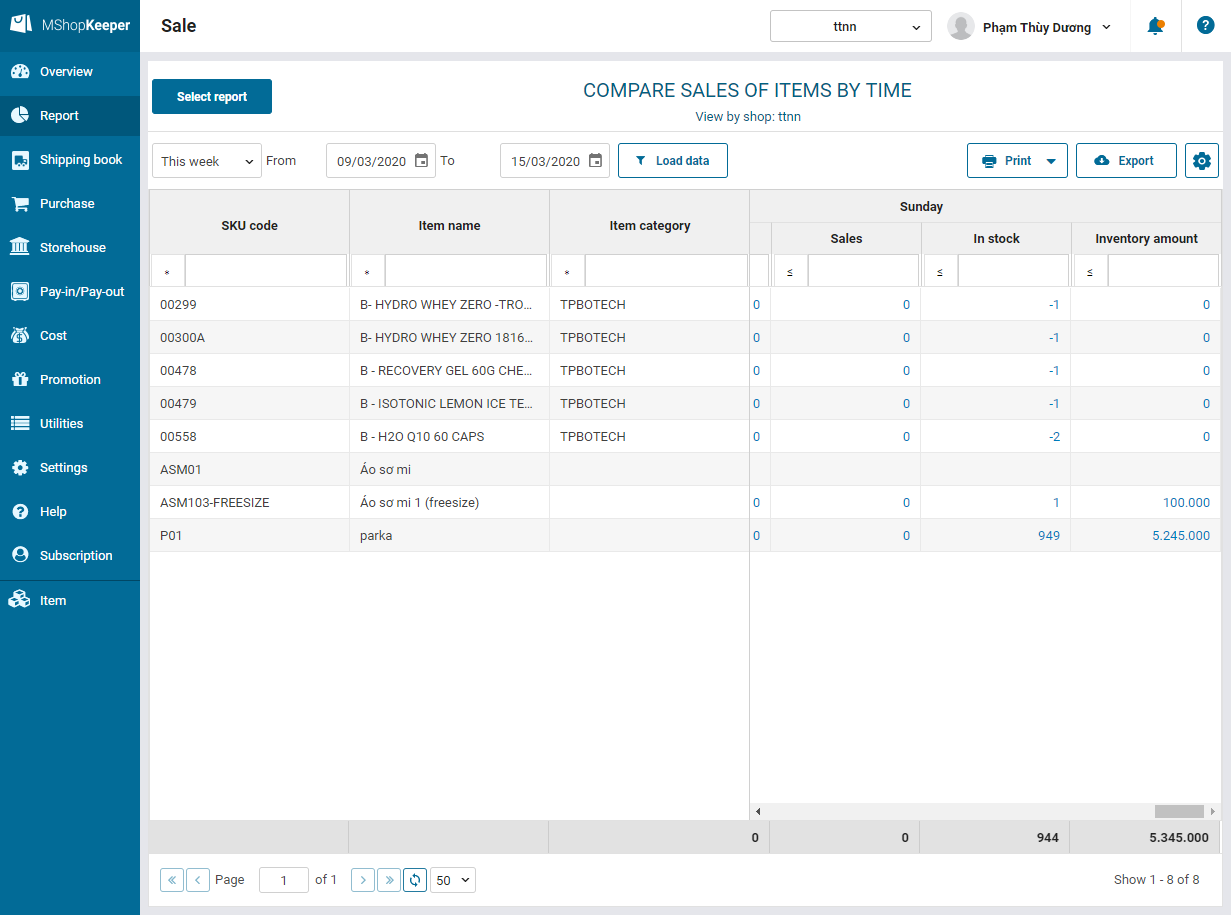
***Note:
– View by Day: The program supports report period within 4 weeks
– View by Month: The program supports report period within 12 months
– View by Quarter: The program supports report period within 2 years
– View by Year: The program supports report period within 3 years
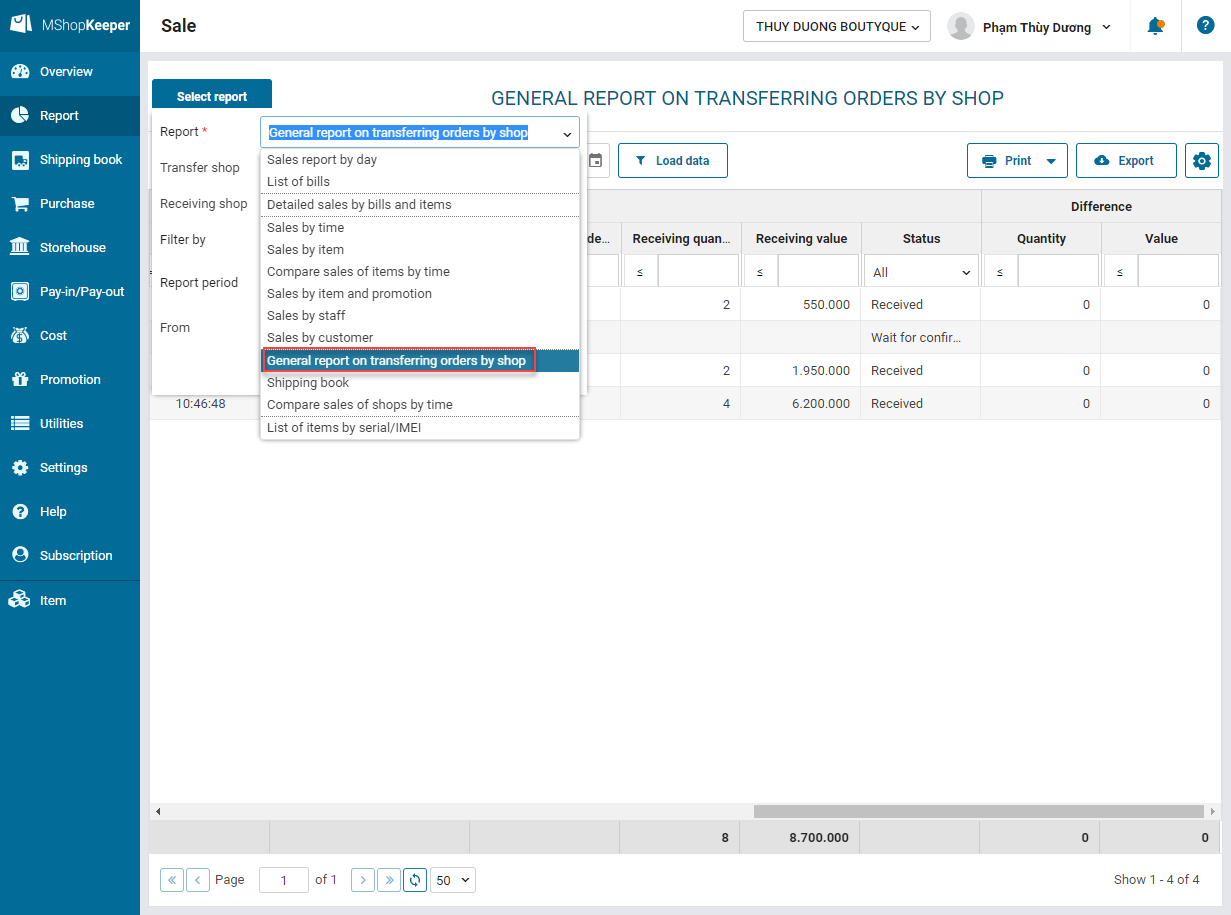
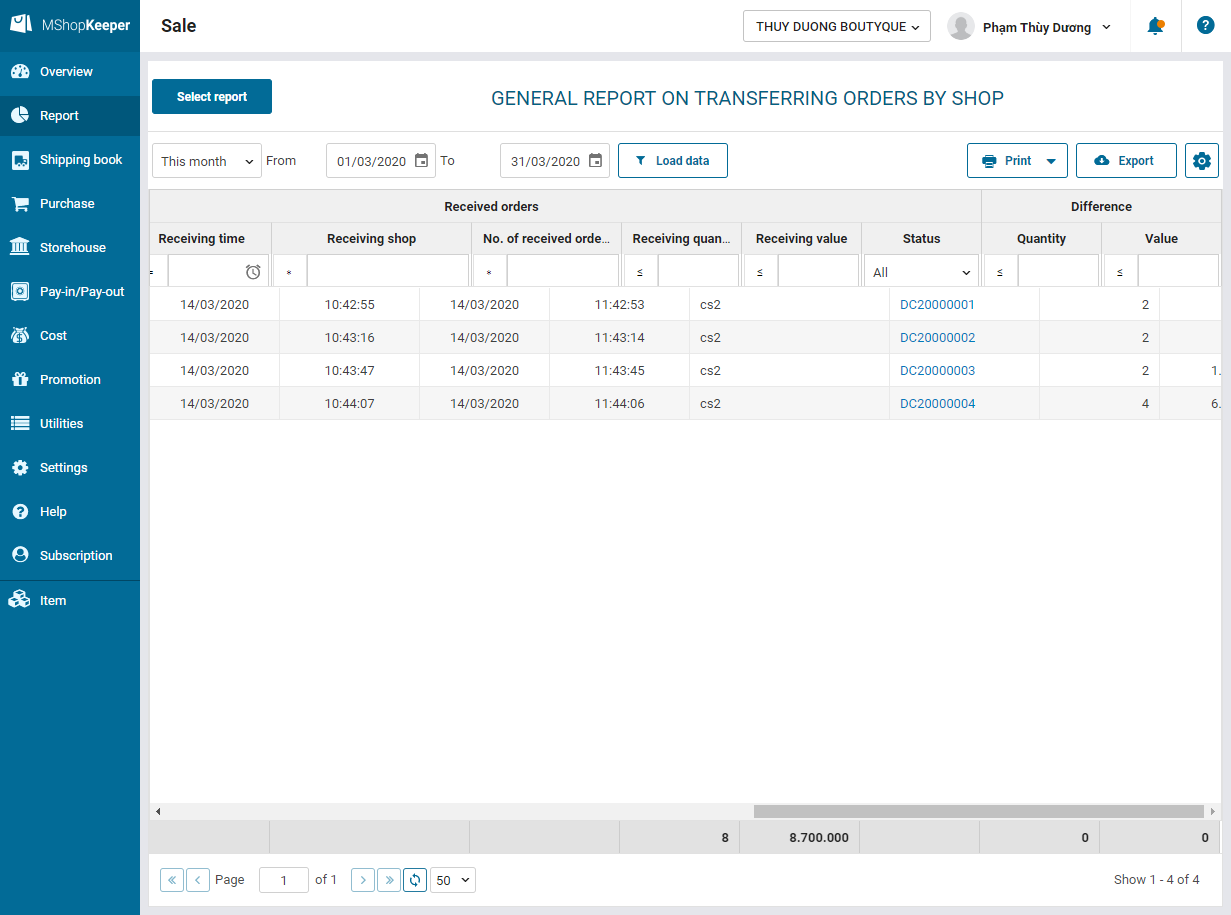
4. The program adds report on stock transfer
Details of change: As of R30, the program adds General report on transferring orders by shop so that the manager can know which bills are transferred, how many orders are transfered to which shop.
Instruction steps:
To create transfer notes, please see II.3 here.
To view reports, please follow these steps:
Step 1: Go to Report\Sale
Step 2: Select report General report on transferring orders by shop
5. The program allows the manager to view sales report by shop
Details of change: Previously, the manager has to click on each item row to check out details. This takes a lot of time. Therefore, as of R30 the program allows to views sales by shop.
Instruction steps:
On Sales by item report, the manager selects parameters to check out report. Check View by shop and click OK.
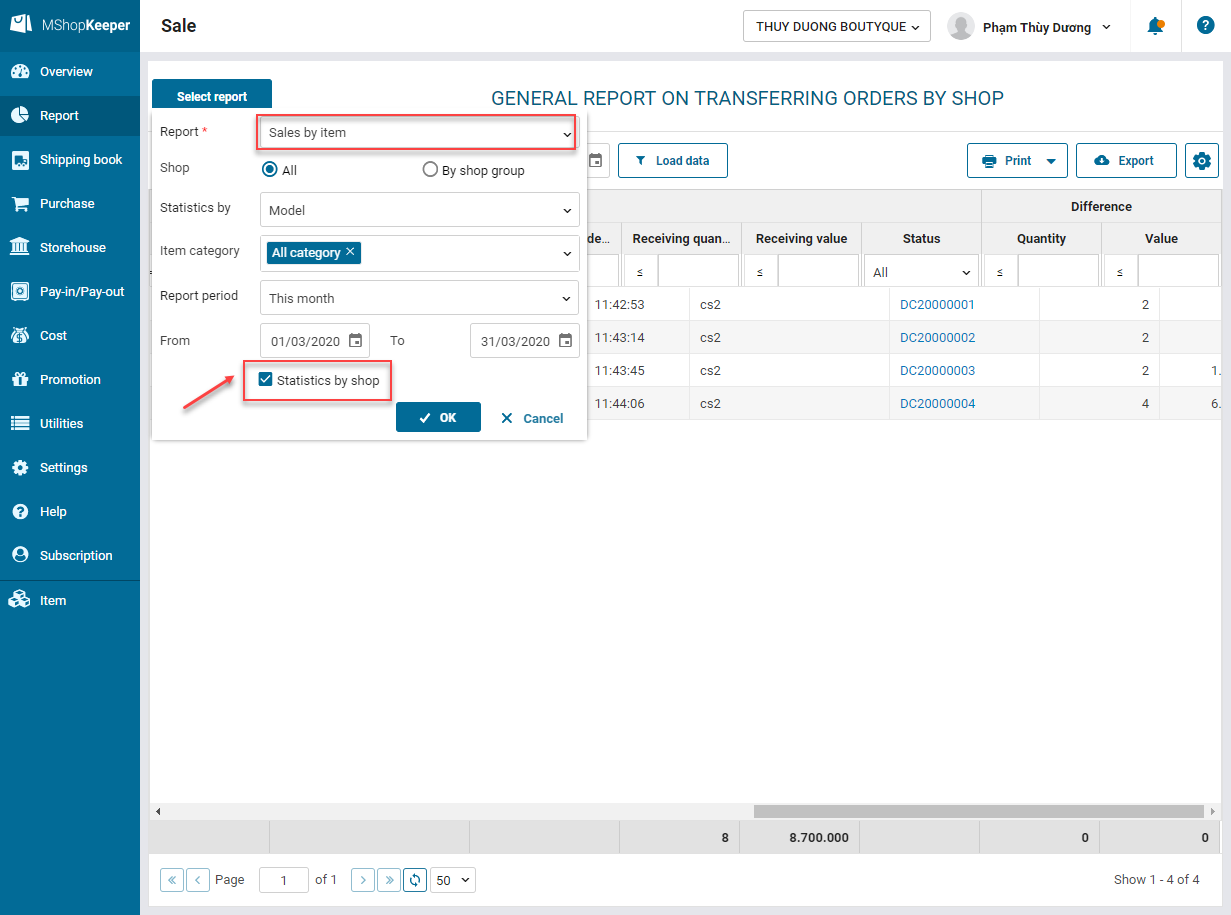
This is Sales by item screen
6. The program adds report on Supplier debt details by note and item
Details of change: Previously, to summarize supplier debt, the account has to collect by each item. This takes a lot of time. Therefore as of R30, the program adds report on Supplier debt details by note and item to save time for the accountant.
Instruction steps:
Step 1: On Report, Select debt report\Supplier debt details by document and item.

Step 2: Select period to load data. Click OK.
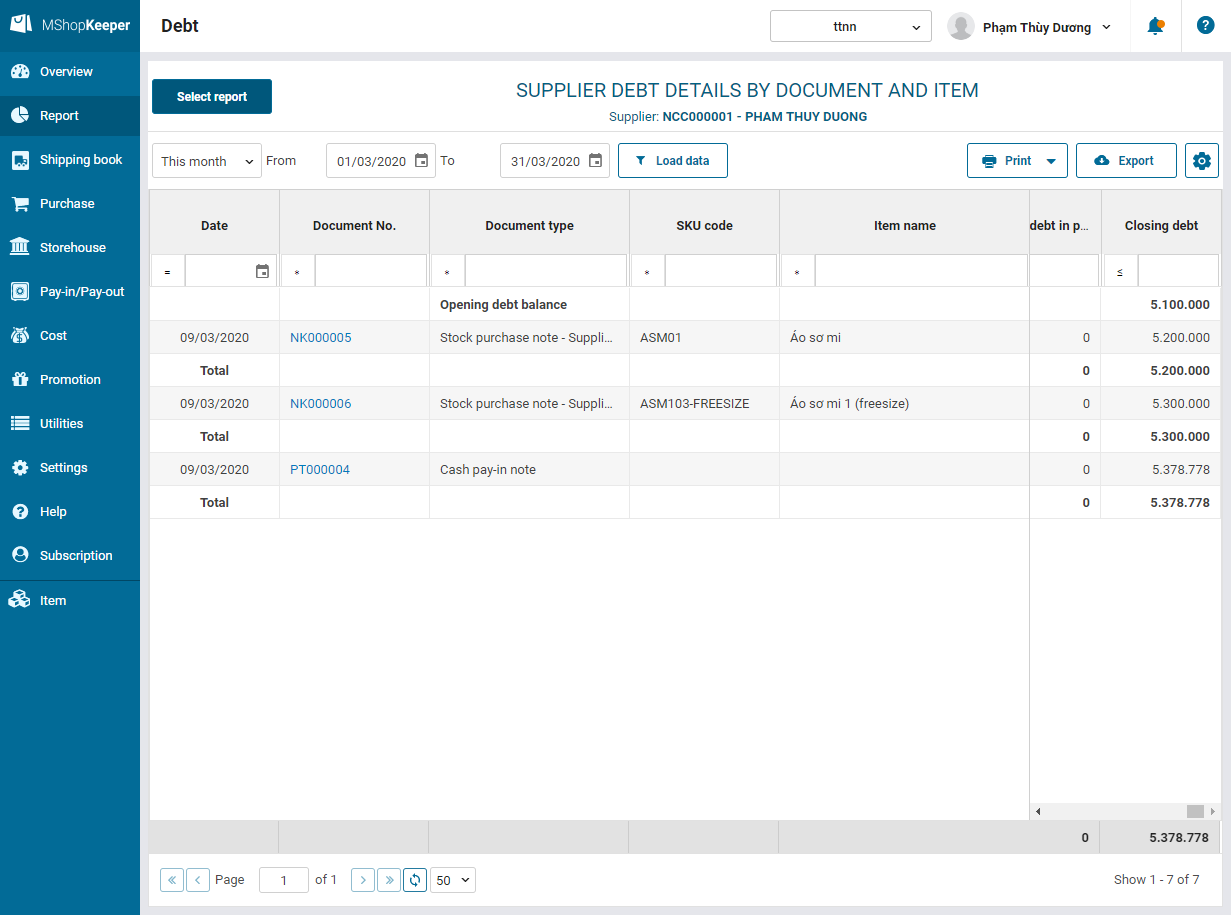
The accountant exports Kế toán xuất khẩu báo cáo ra tệp excel hoặc có thể chọn in báo cáo dưới dạng pdf.
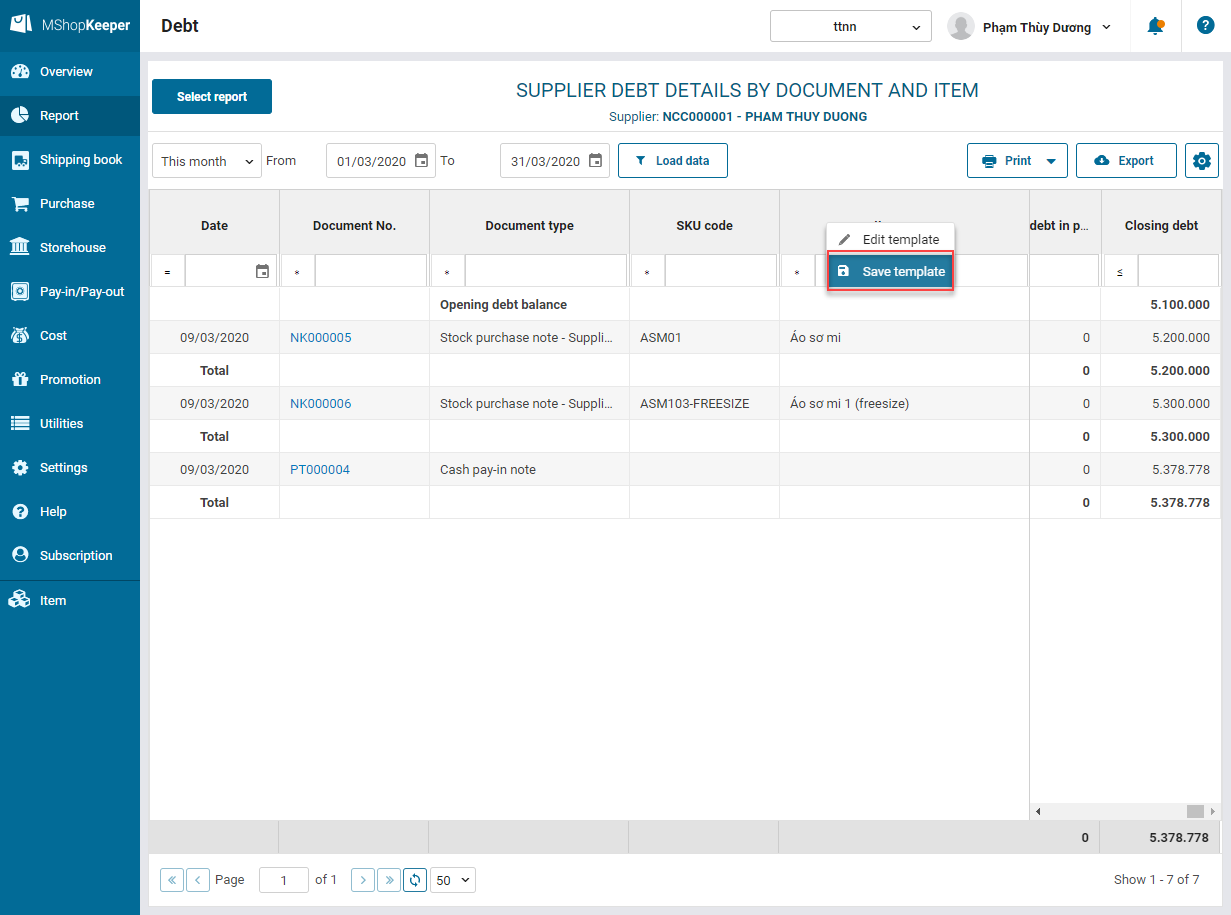
7. The program adds the feature Save width and Print report in PDF.
Details of change: As of R30, the program allows to Save width of the column after editing, print reports in PDF and export documents to Excel file.
Instruction steps:
- Save width of the column
Step 1: Select report to edit the width.
Step 2: After that, right click on Save template.
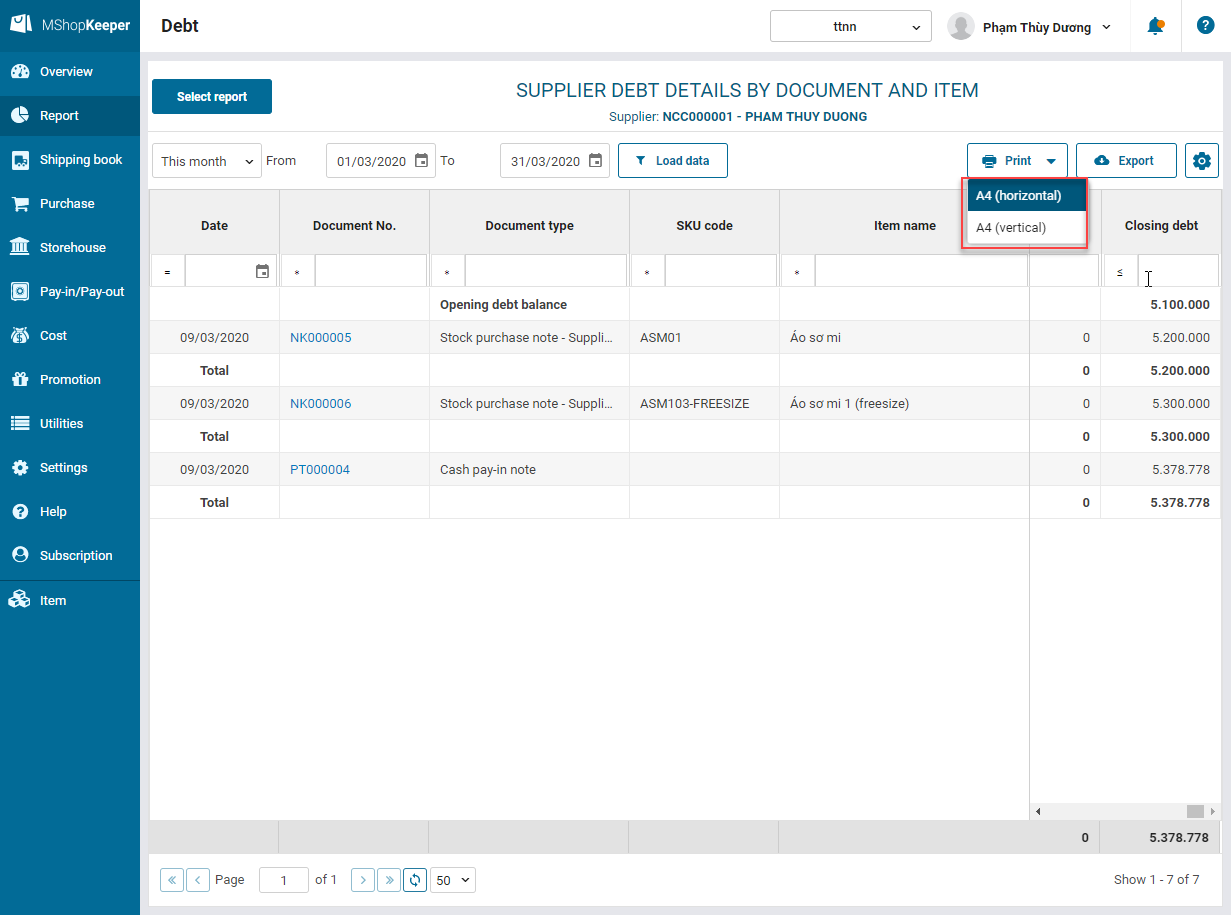
- Print report in PDF
After editing the report, click Print and select the paper size.
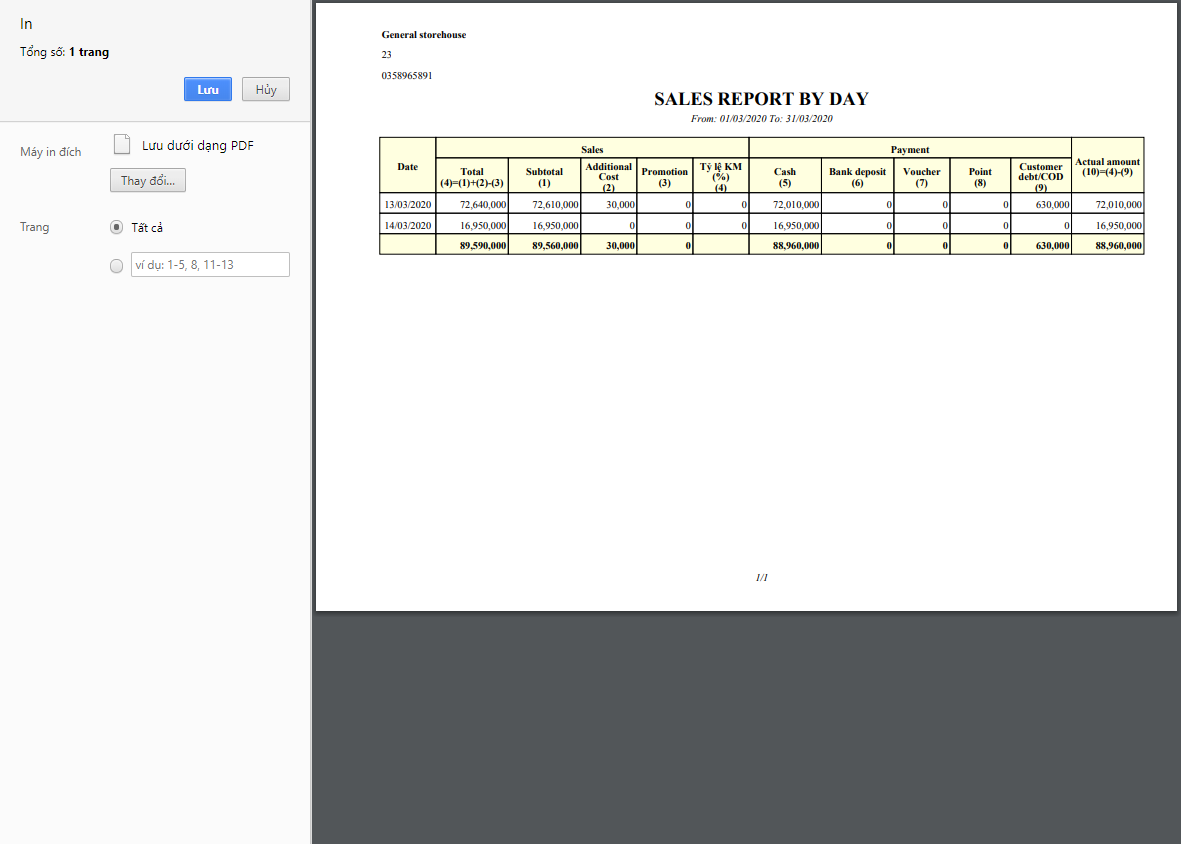
This is preview screen
8. The program improves numbering rules
Details of change: As of R30, the program adds the feature: Use Shop document ID to number the documents. This facilitates the manager/accountant in following up documents from shops in the chain.
Instruction steps:
Step 1: Go to Settings\Document numbering rules. At Shop document ID, select Edit.
Shop document ID only shows when the shop is a chain with 2 shops or more. The program defaults 4 first letters of the shop.
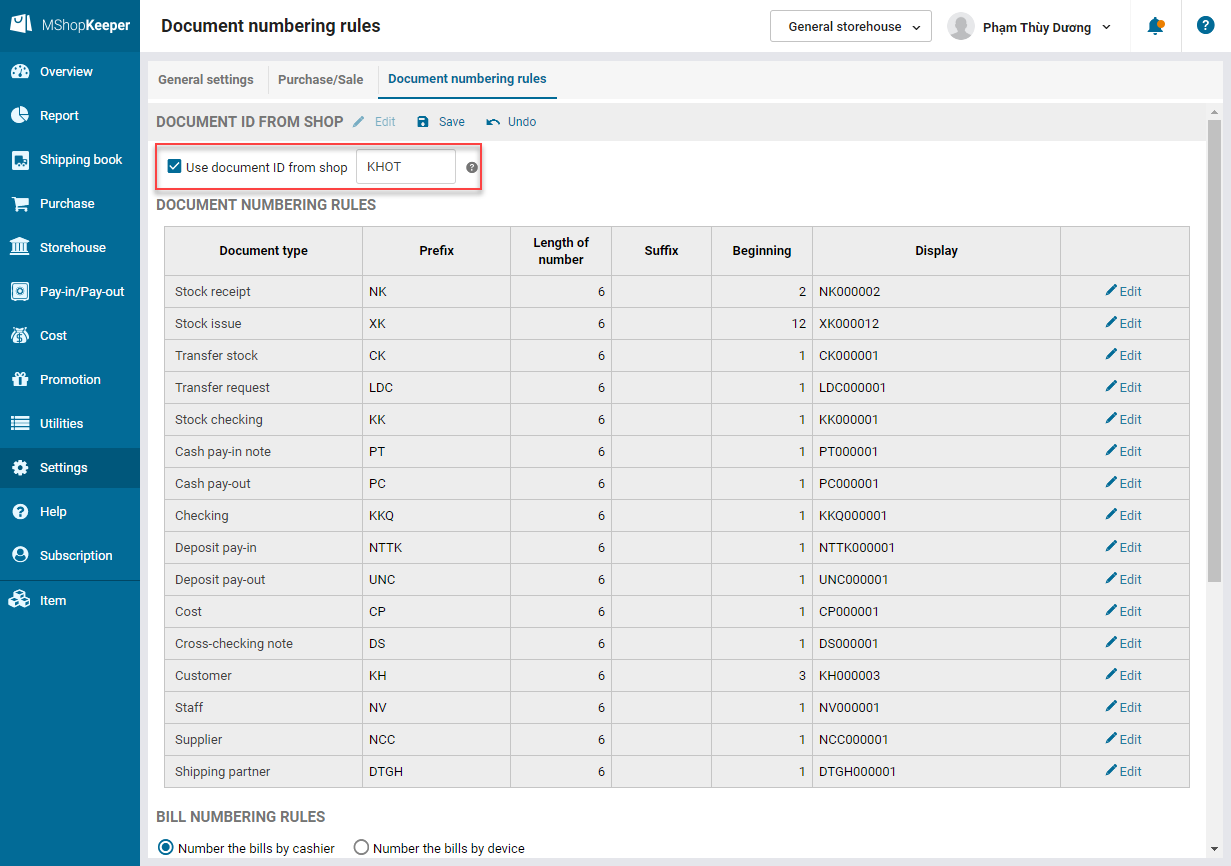
Step 2: Check Use shop document ID. Click Save.
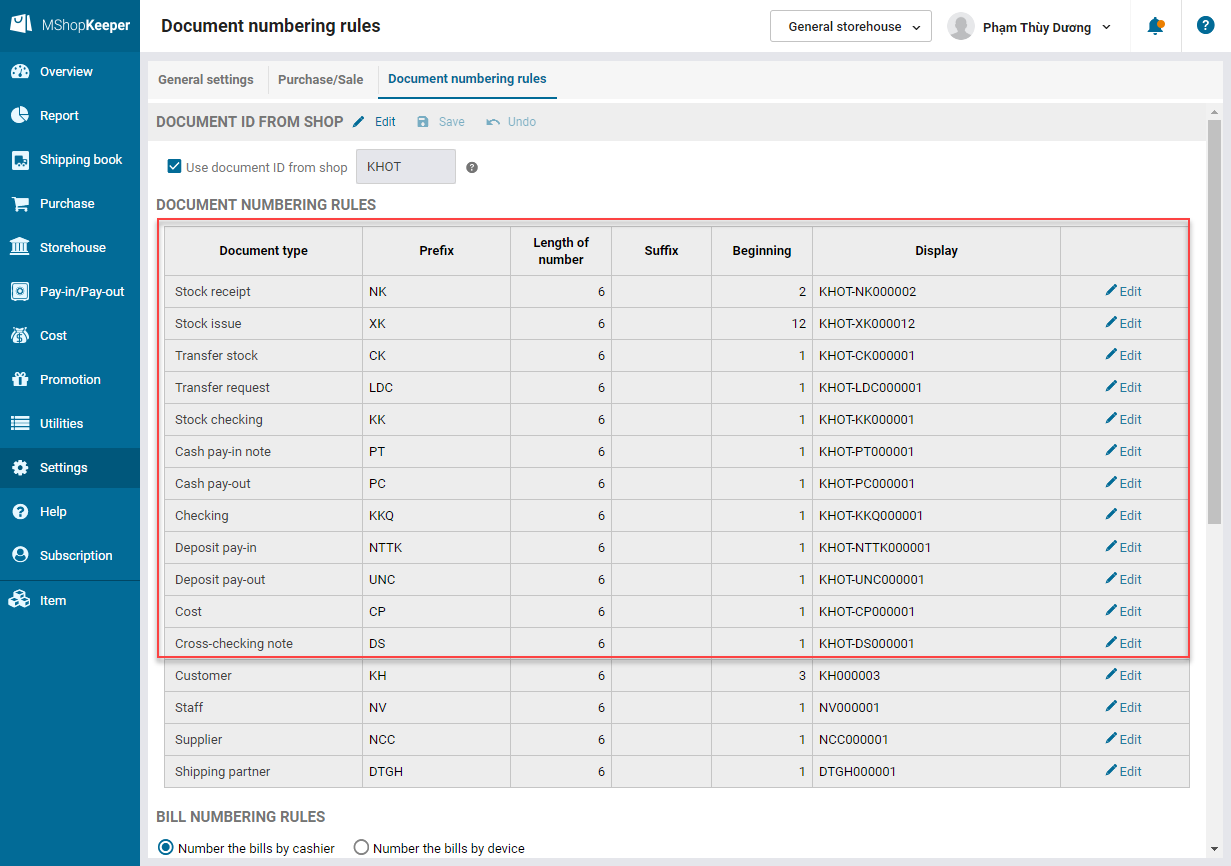
After saving settings, when the shop creates bills and documents, the document ID will be in this format <Shop document ID>-<Common document ID>.
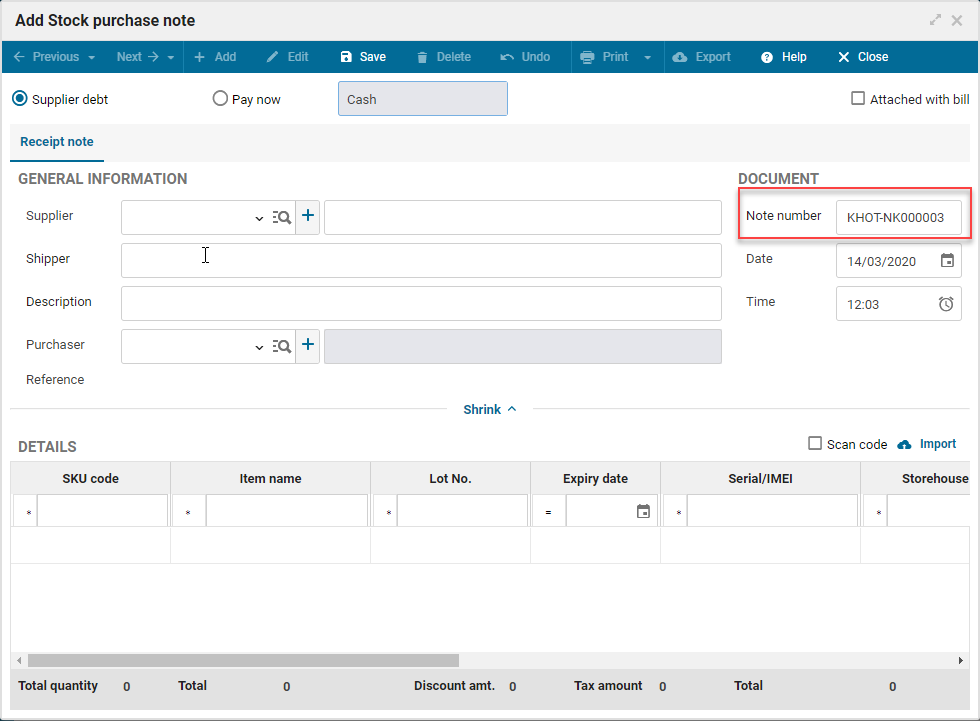
E.g: Add new note.
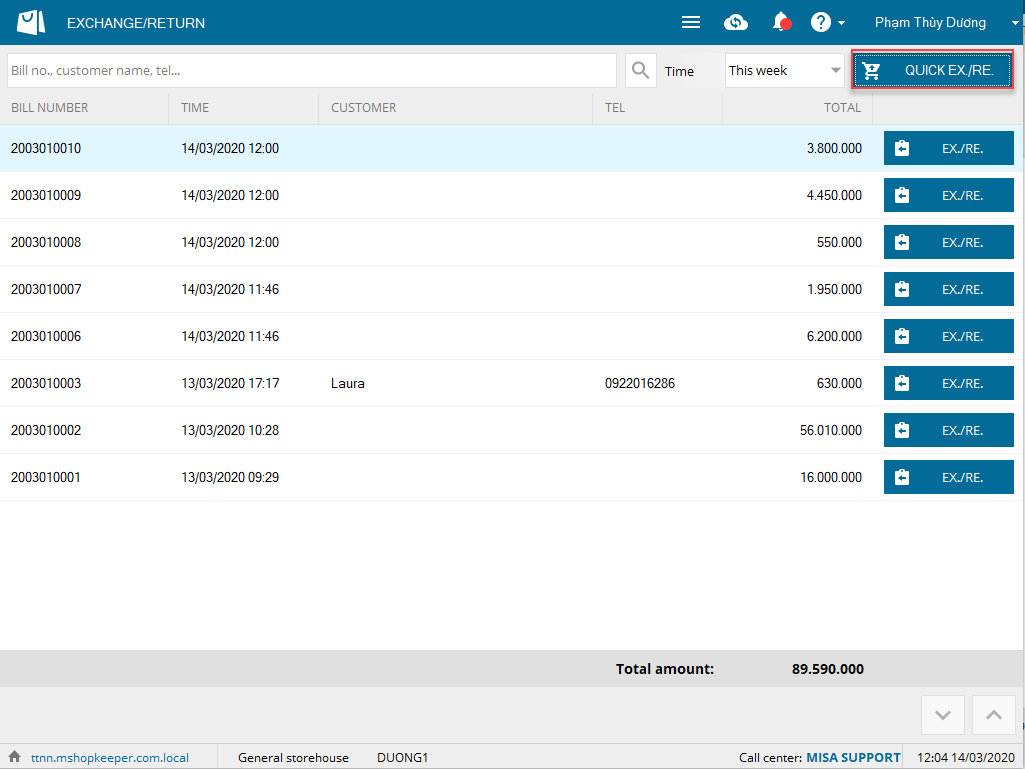
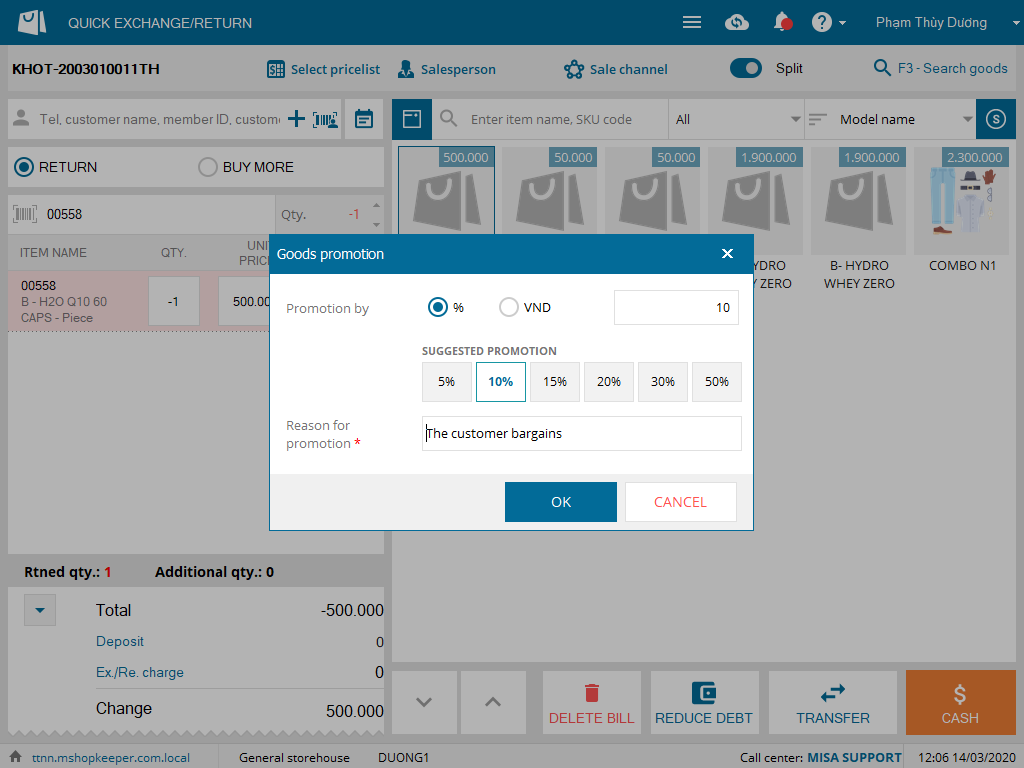
1. The program allows the cashier to add promotion to the returned item upon exchanging/returning item
Details of change: Previously, when exchanging or returning any item the cashier cannot apply promotion for the returned item. , the cashier can do so.
Instruction steps:
Step 1: Select Quick Exchange/Return
Step 2: Select item to be returned and right click on Promotion.
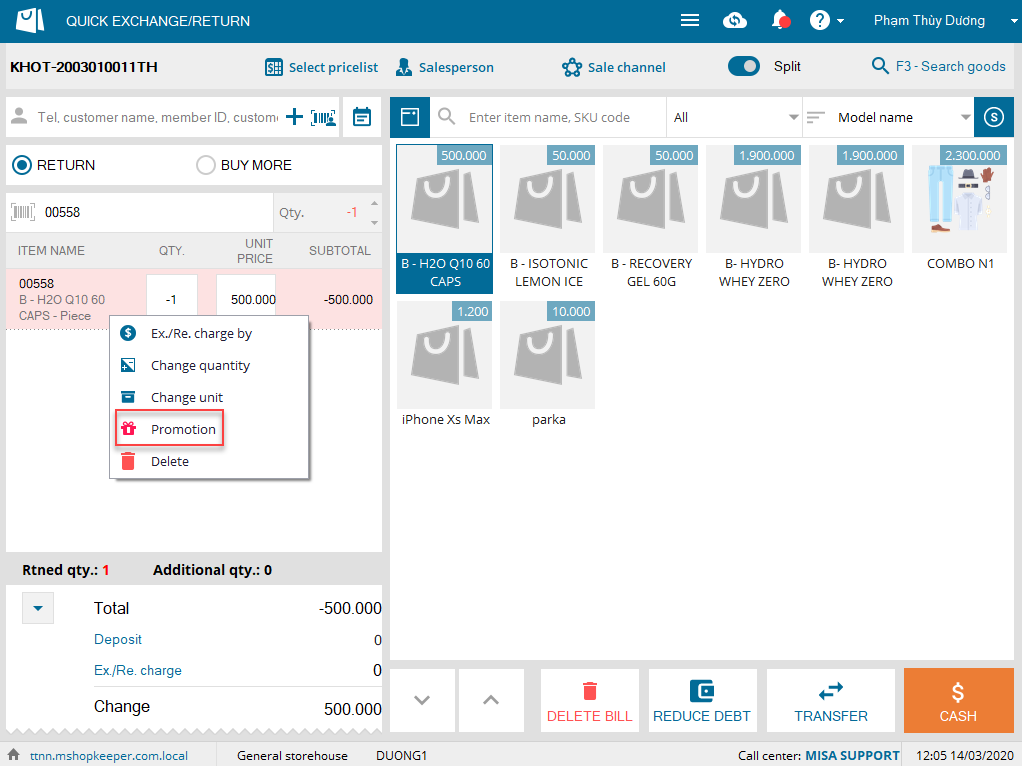
Step 3: Enter promotion for the returned item.
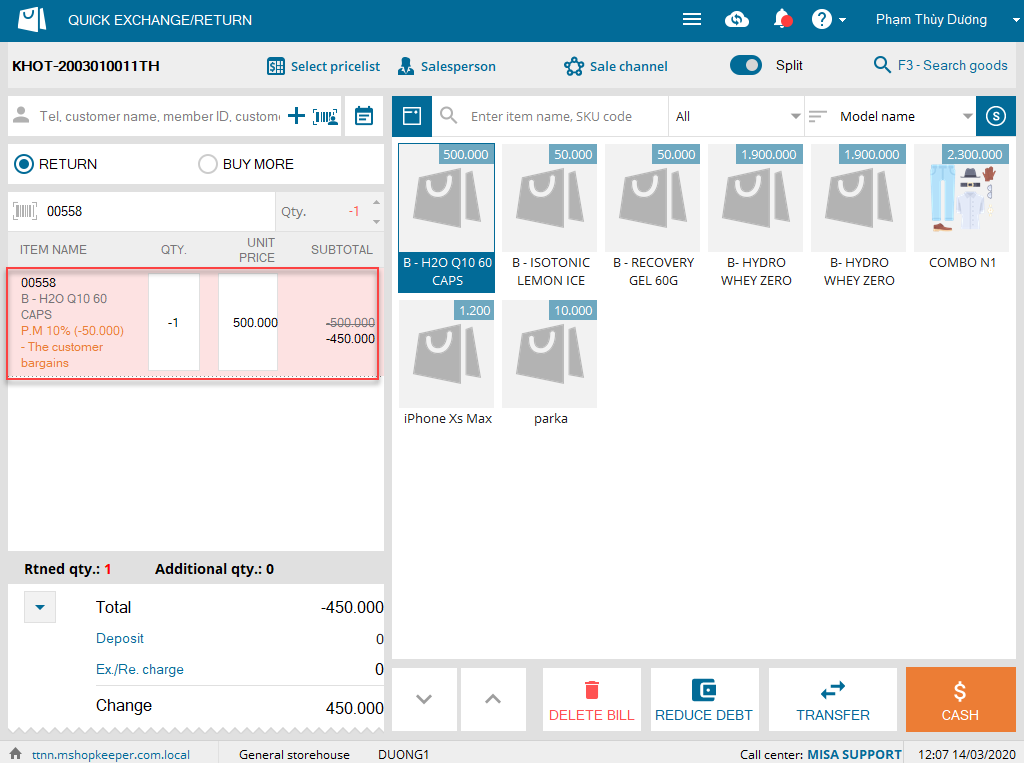
Information on the returned item after adding promotion.
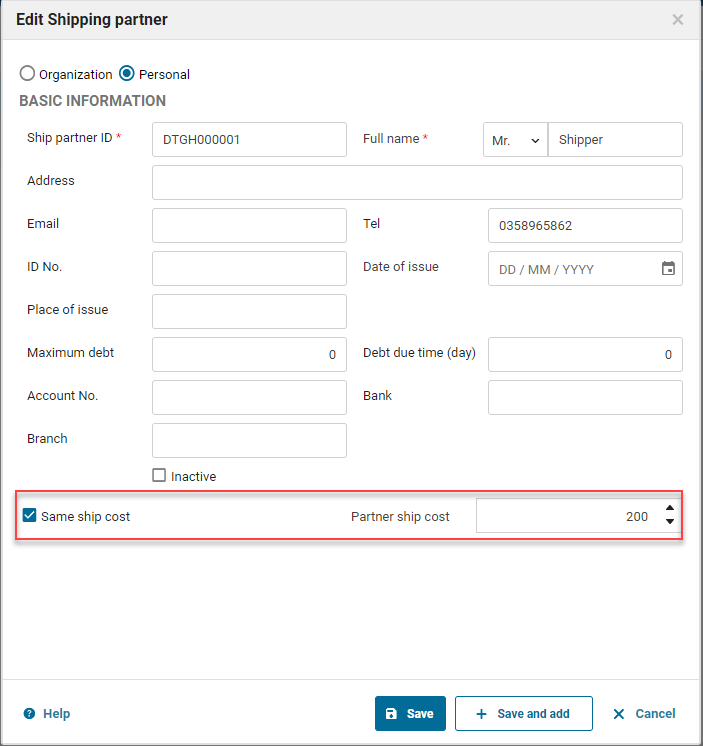
2. The program allows to edit Same ship cost.
Details of change: Although the shop signs a Same-ship-cost contract with a ship partner, the program updates ship cost as per the partner’s service type. , the program allows to set Same ship cost which will remain the same even when the shop changes the service type.
Instruction steps:
Step 1: Go to Utilities\Ship partner, click Edit and enter the same ship cost. Then click Save.
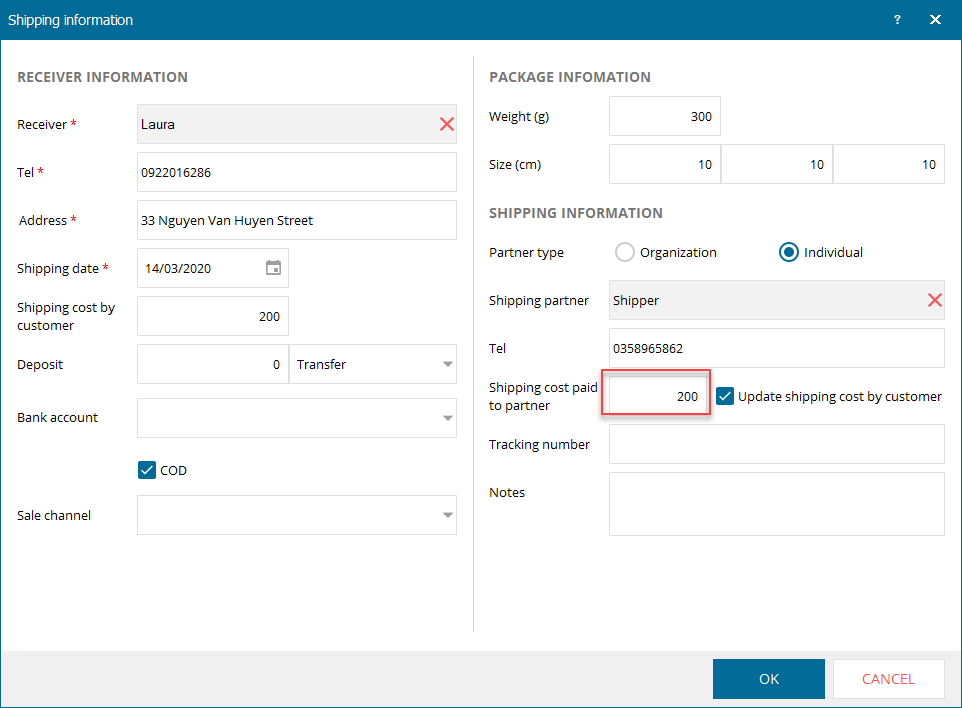
Step 2: Create shipping orders
- If Same ship cost is selected on the management page, shipping cost paid to partner remains the same even when the cashier changes service type.
- If the cashier wants to change ship cost, click on Shipping cost paid to partner and enter the cost.
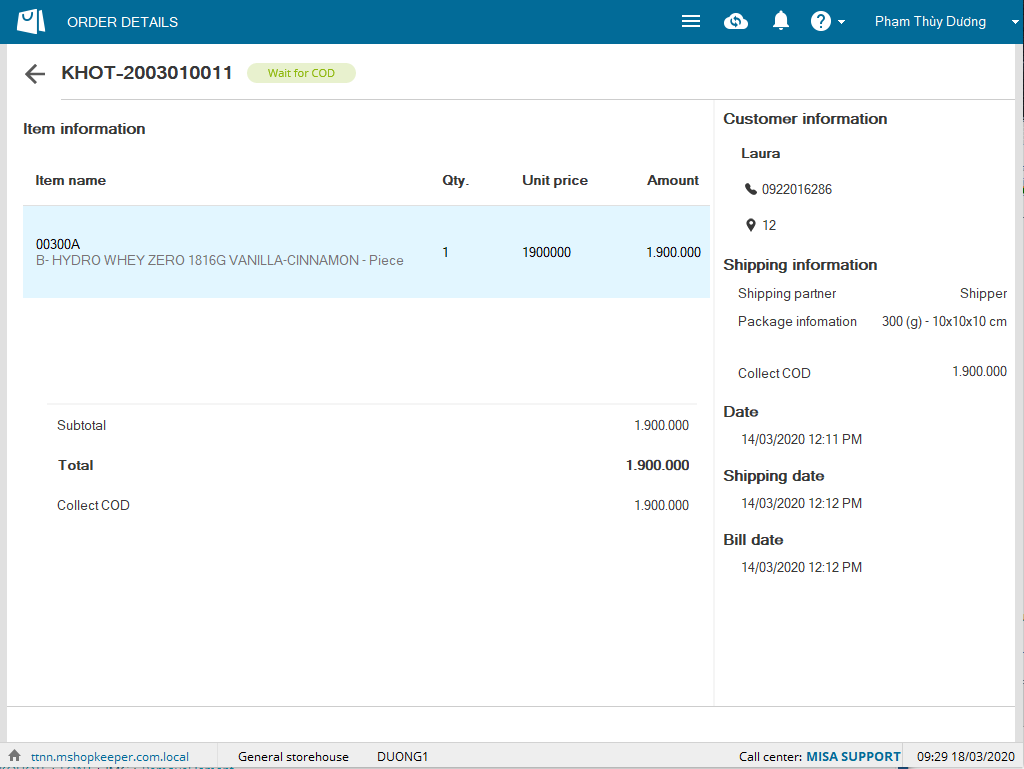
3. The software improves some functions on Order screen (Shipping book)
Details of change: As of R30, the program adds and improves some functions on Order screen (Shipping book) to facilitate the cashier.
New improvements:
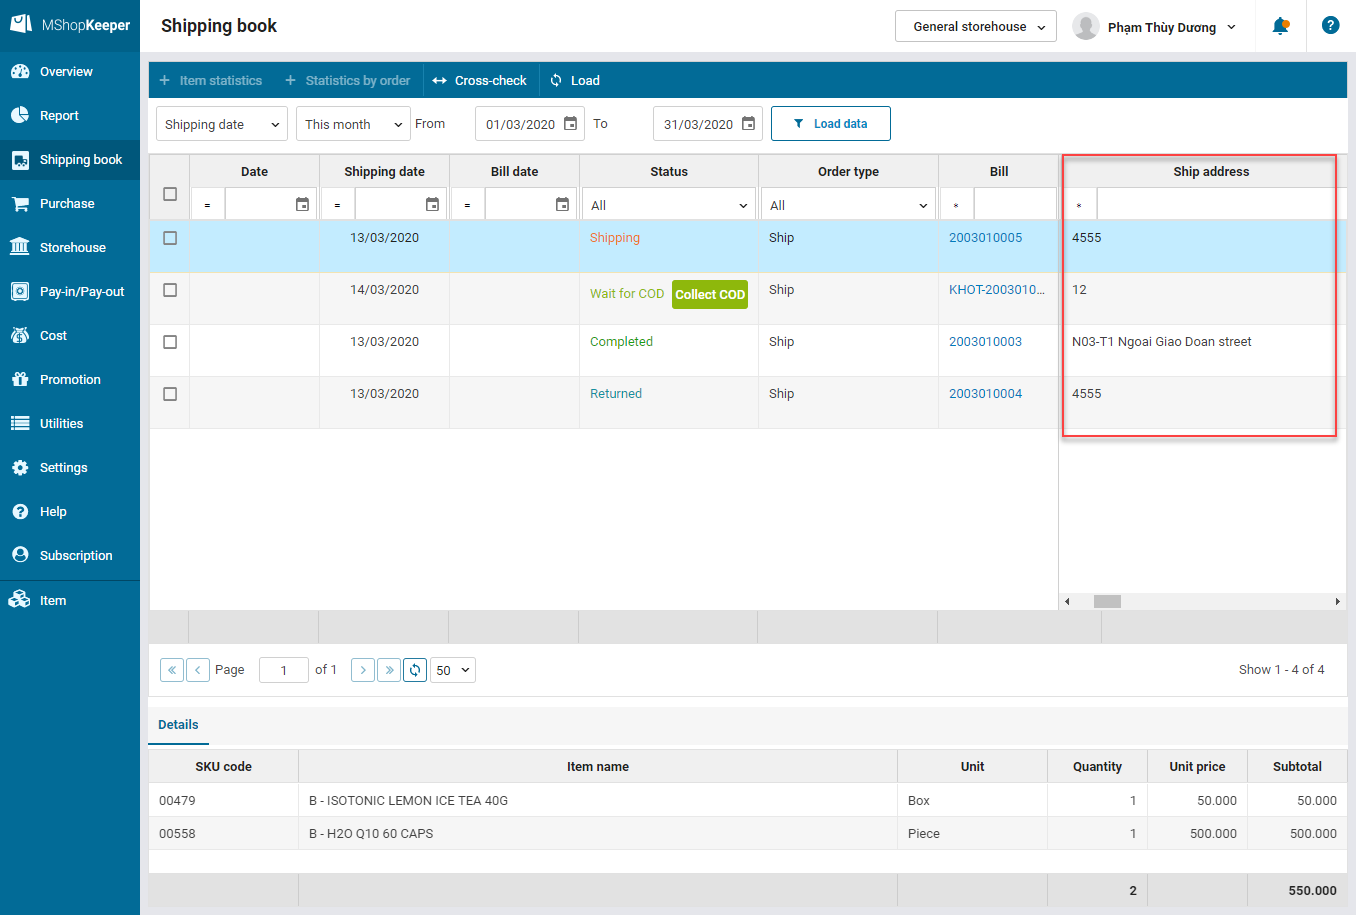
– On the management page
- Add columns Date, Bill date.

- Add column Ship address of the customer
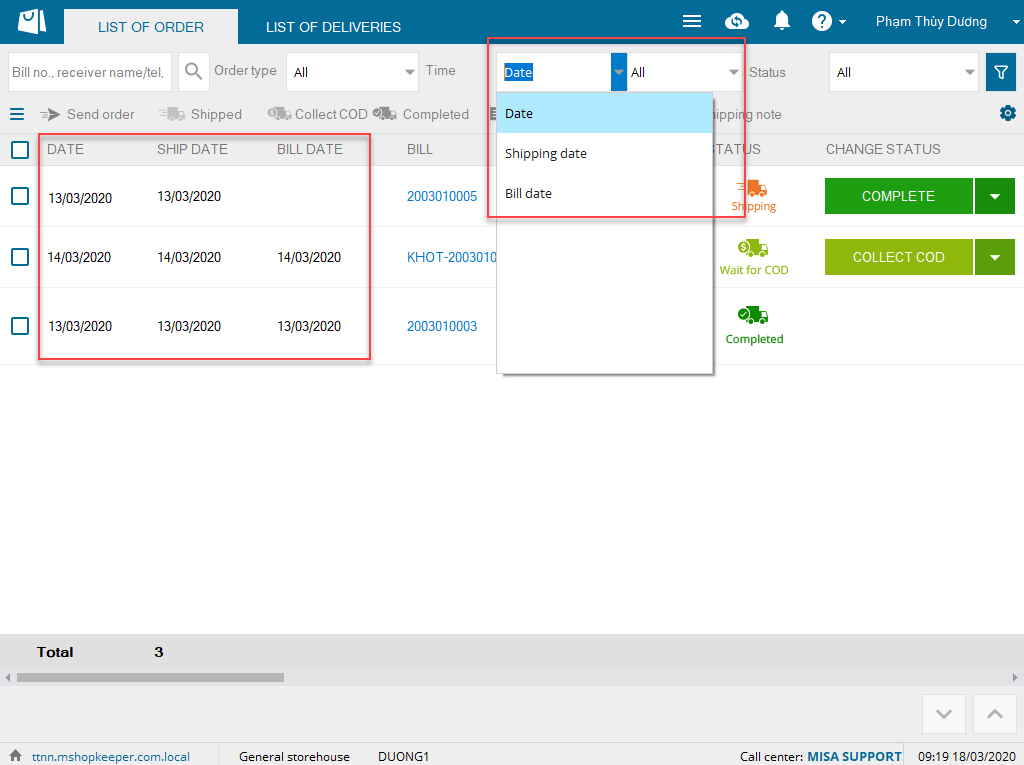
– On PC Sale
- Add columns Date, Shipping date, Bill date: The cashier can filters orders by these columns
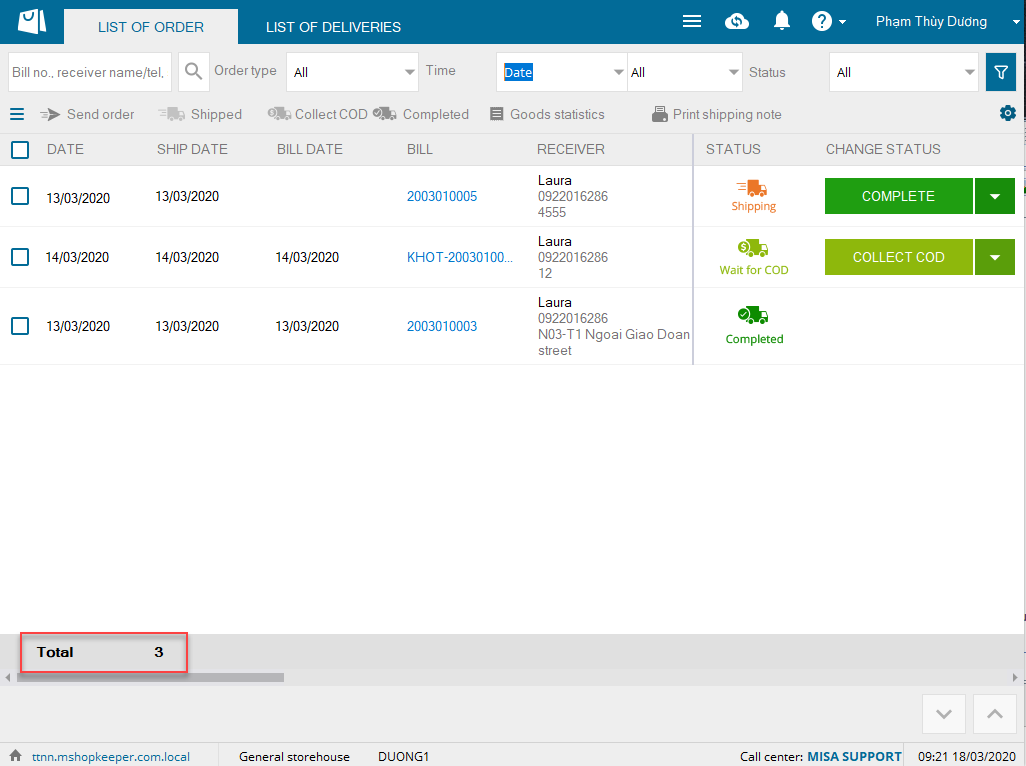
- Add Total orders to the last row of order list
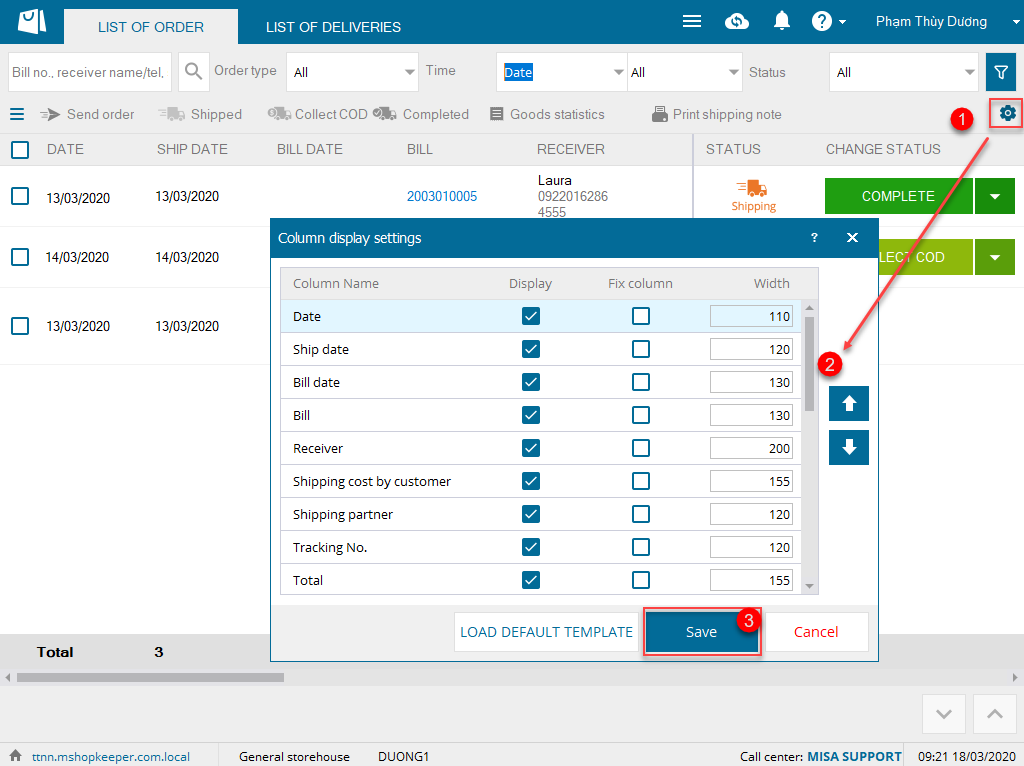
- Allow to edit template
- Allow to view order details in all statuses:

Click any order to view details
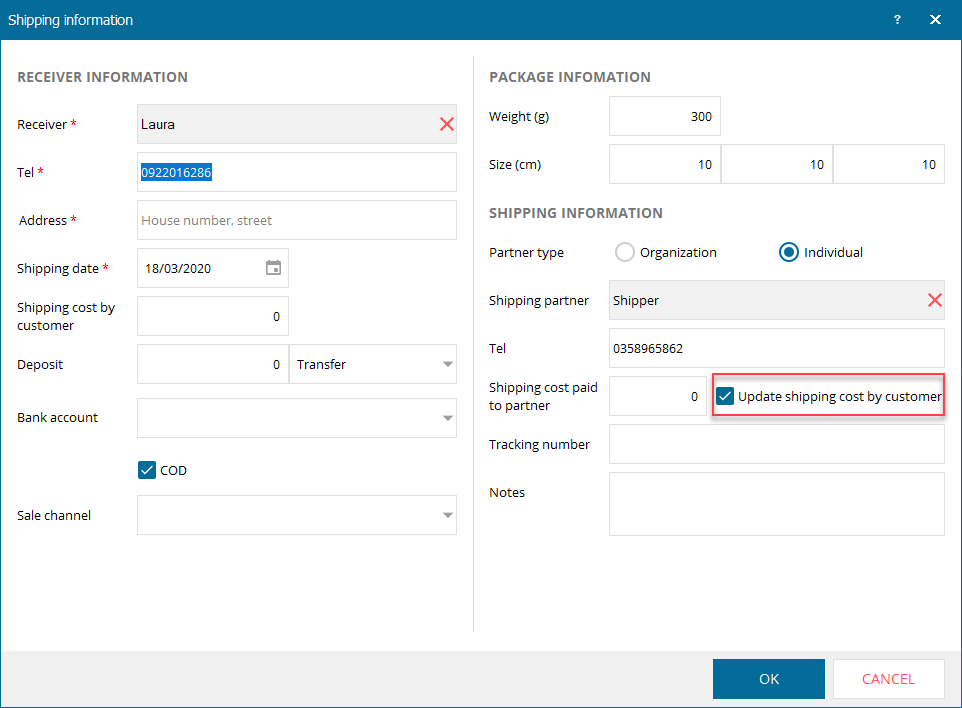
- Add function Update shipping cost by customer on Ship information screen
-
- By checking Update shipping cost by customer, when the cashier enters Shipping cost paid to partner, the software will update Ship paid by customer equal to Shipping cost paid to partner
- By not checking Update shipping cost by customer when the cashier enters Shipping cost paid to partner, the software will not update Ship paid by customer equal to Shipping cost paid to partner.
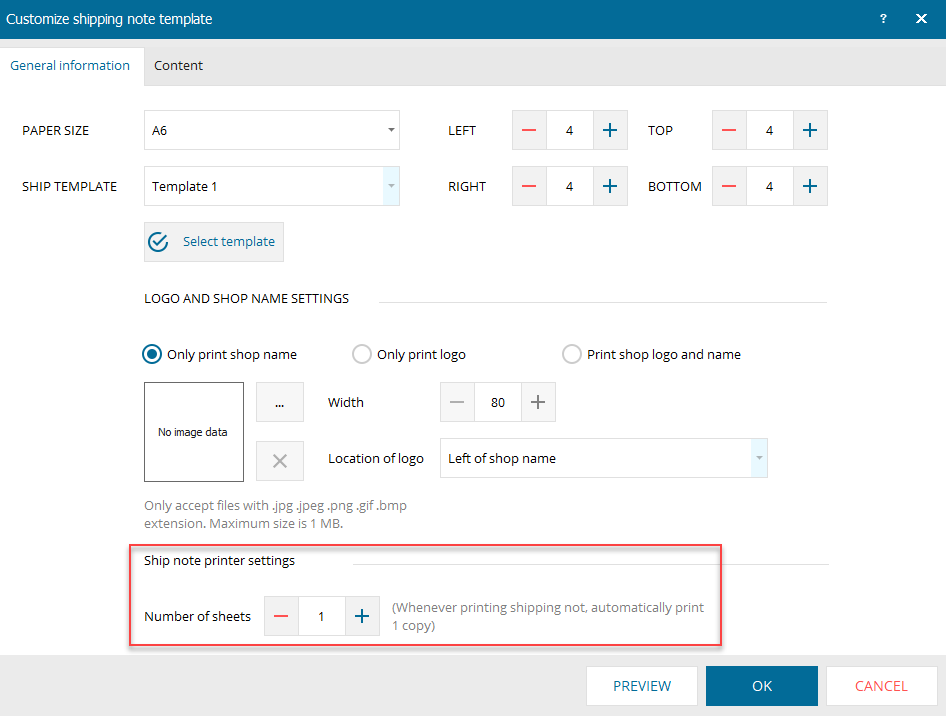
- Allow to set up the number of copies when customizing delivery note template