For the shops which connect to printer via LAN network, IP address of the the printer is usually dynamic. This may lead to the situation that after installing the printer can work properly, but some time later it cannot print because its IP is changed. To solve this, the shop should set a Static IP (fixed IP) for the printer so that the printer can work stably. To do so, please follow these steps:
Step 1: Check current MAC and IP address of the printer.
Step 1: Check current MAC and IP address of the printer.
- To check current IP address of the printer, print a test page. Different printers have different ways of printing a test page. For example: For Epson printer: Turn it off, hold Feed button and then turn it on.
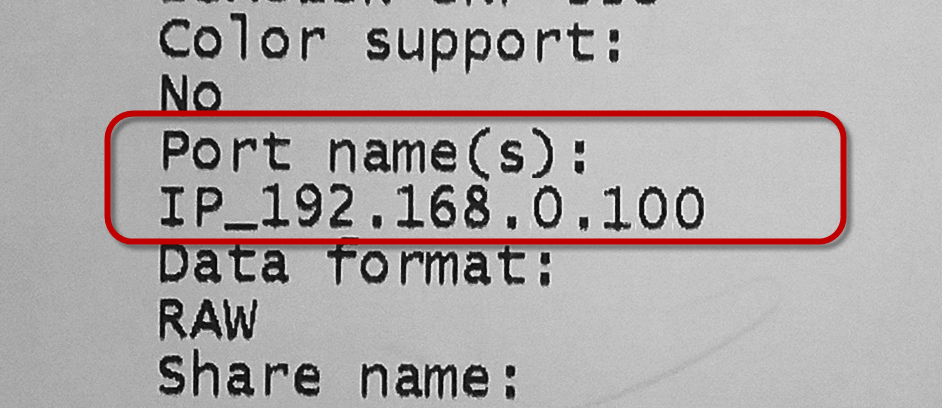
- Each printer has a single MAC address. MAC address is shown in the test page or attached with the product information on the printer or in the manual (it is possibly shown in Physical address or Hardware address).
Step 2: Assign a static IP to the printer
- From a PC in the LAN network, open the browser and access to IP address of the router and enter username, password in Settings. Note: If the user has not changed IP address or access account, it is defaulted as follows:

- Router TPLink: IP address: 192.168.0.1; user admin; password: admin.
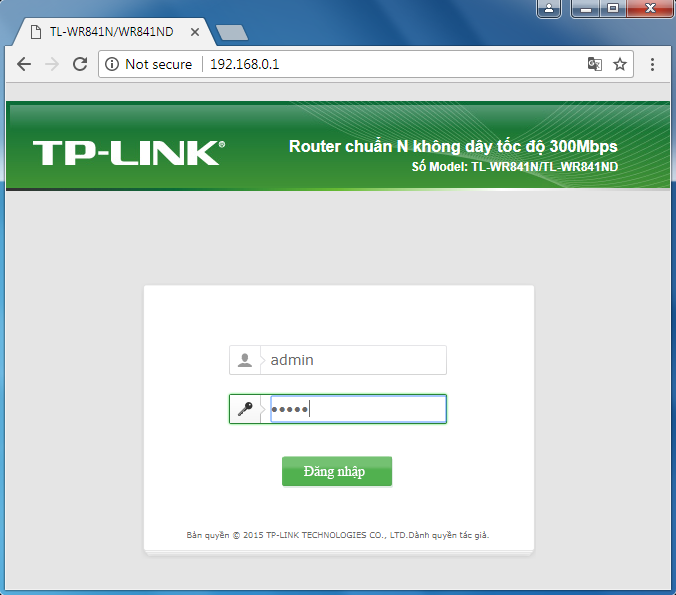
- Click Log in.
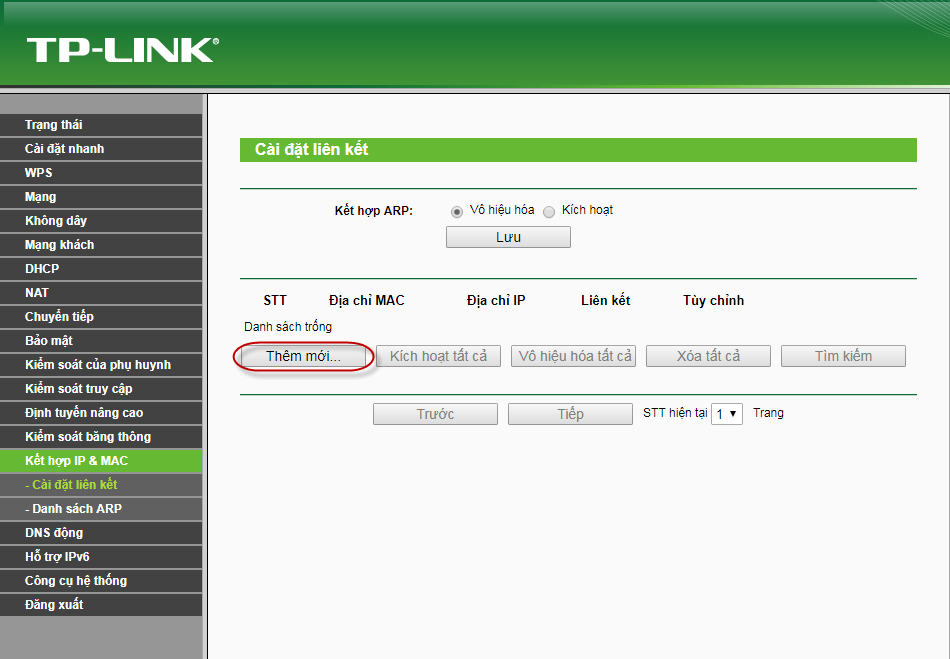
- Click Connect IP & MAC, select Install connection.
- Click Add.
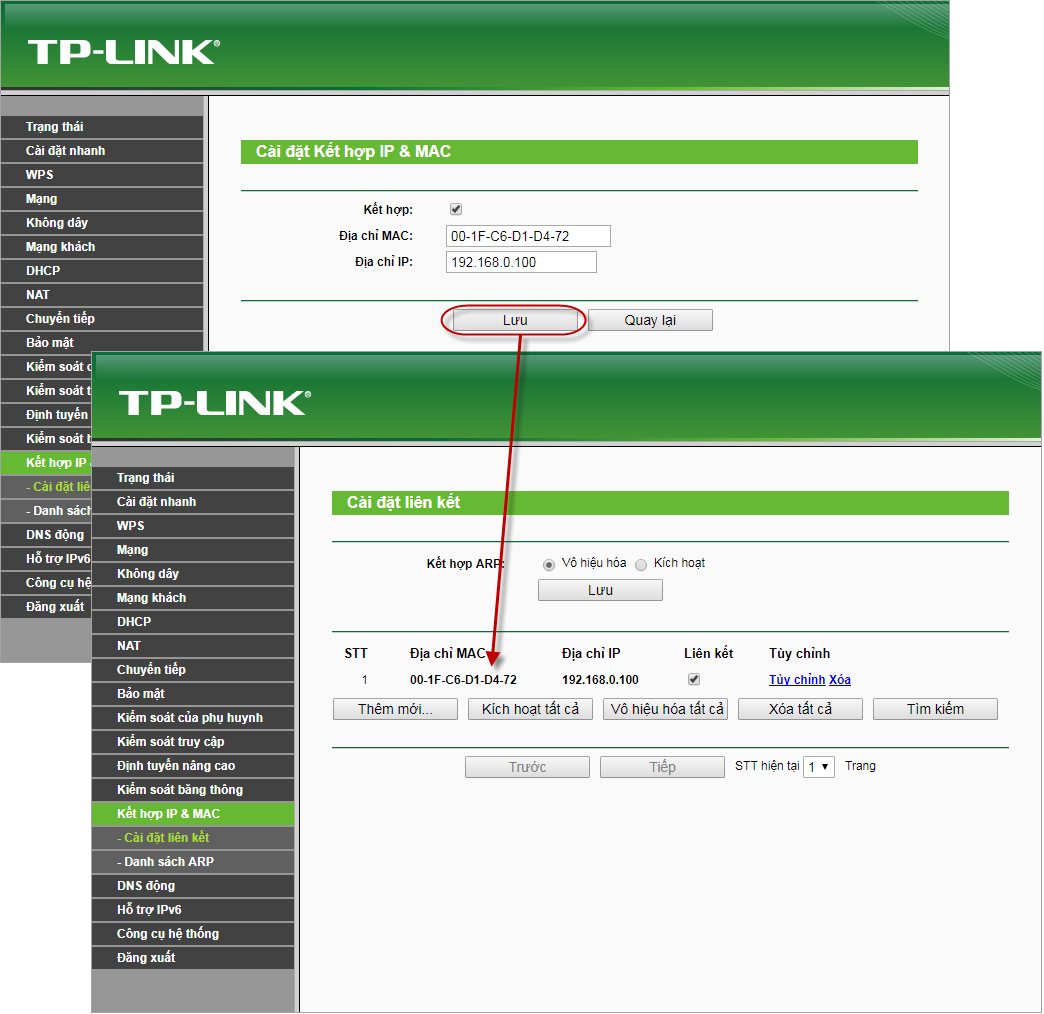
- Enter MAC Address of the printer.
- Enter IP Address to be assigned to the printer.
- Click Save.
- For the other providers, you can set up by searching in LAN network settings, then MAC Address and IP Address.
Here is how to set up network for some common routers:
Tenda: http://www.tendacn.com/en/faq/2165.html
Dlink: https://superuser.com/questions/1162417/d-link-router-assign-fixed-ip-address-for-given-mac-address
Linksys: http://www.linksys.com/us/support-article?articleNum=135673
Toto: http://www.totolink.net/sub/support/faq/content.asp?idx=30&product_num=&s_kinds=&s_word=


