1. Purpose
Instruct the manager how to Print labels for new models or additionally imported models with MShopKeeper Import Data tool.
2. Instruction steps
To print label with MShopKeeper Import Data tool is divided into these cases:
- Print labels for the recently imported items
- Print labels for new models
- Print labels for current items
Note:
- For the first time of using MShopKeeper Import Data tool, you need to log in MShopKeeper Sale. For the next times, you do not need to do so.
2.1. Print labels for the recently imported items
Step 1: Create a list of items to print labels
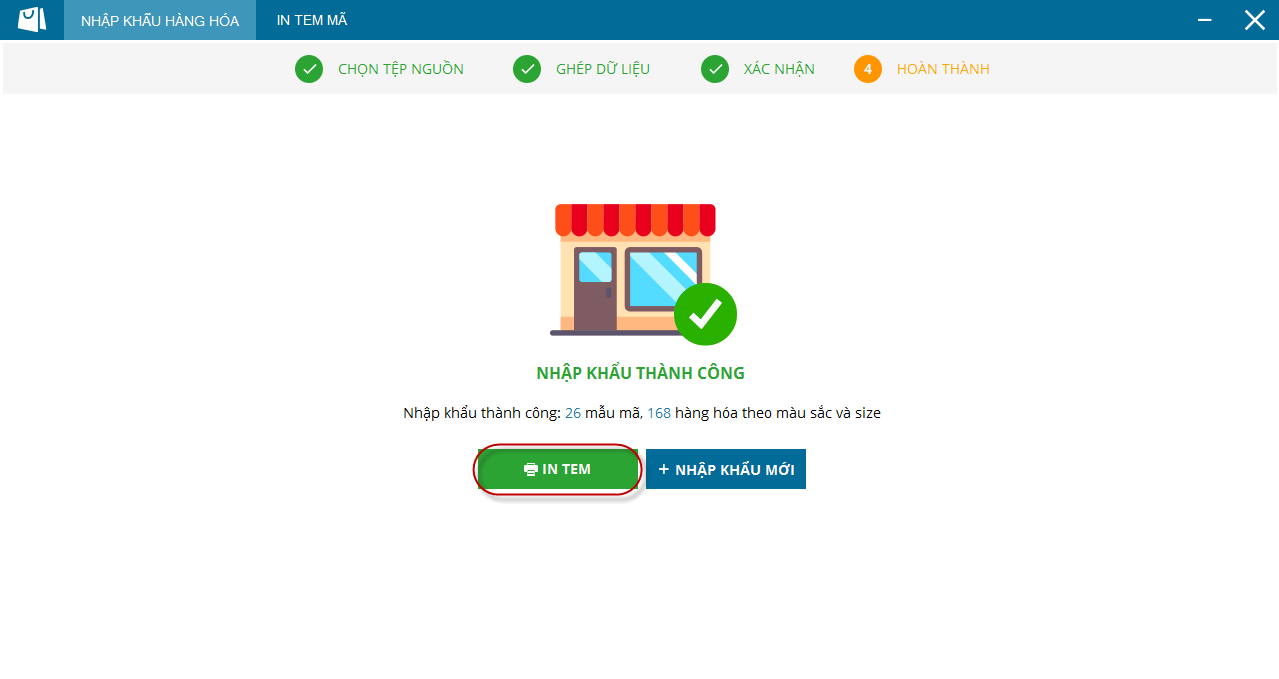
1. After importing list of items from an Excel file, on Import items screen click Print label.
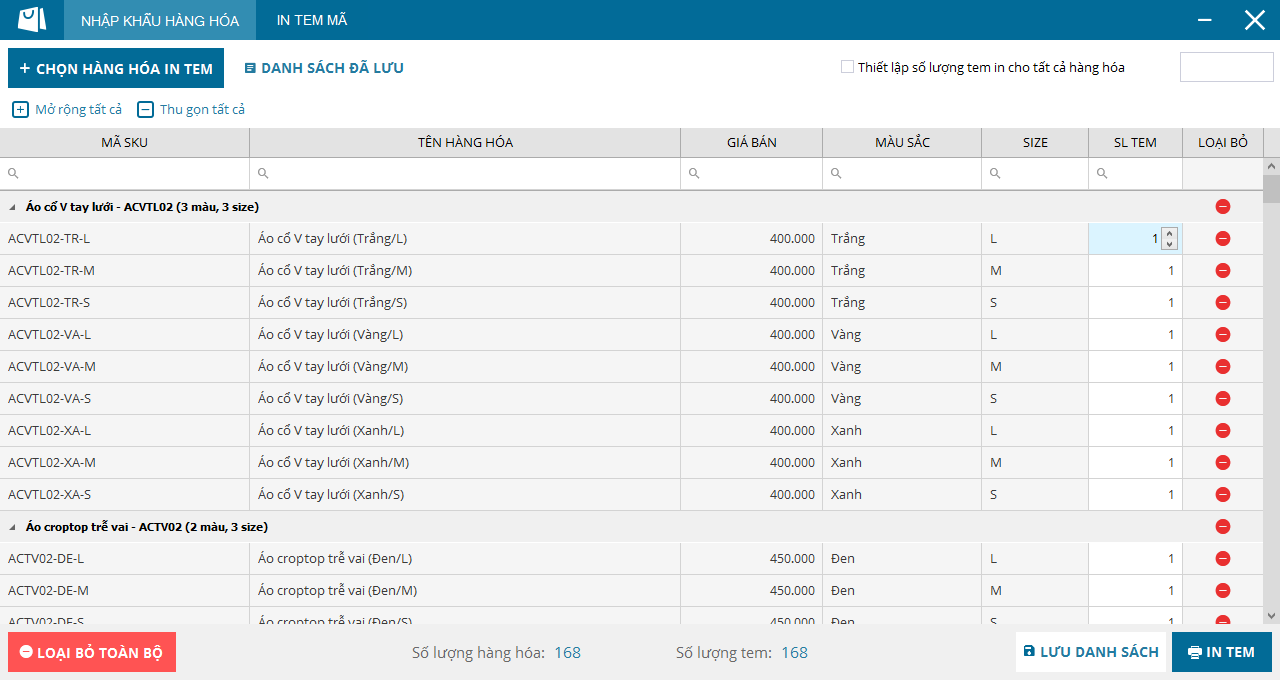
2. The program shows list of items which have just been imported.
Step 2: Print label
After creating the list, print labels as follows:.
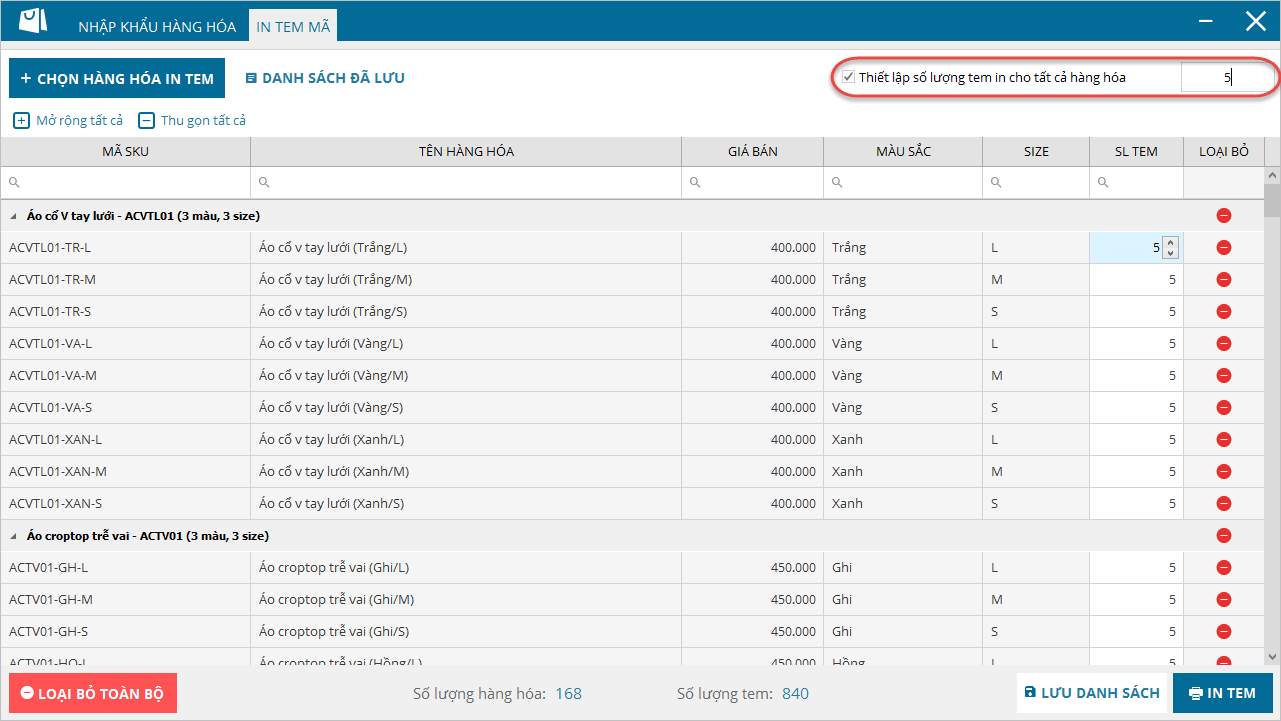
1. Enter the number of labels to be printed for each item.
2. Or check Set number of printed labels for all items and enter the number of labels to be printed for all items. (You can re-enter number of labels to be printed for certain items).
3. Click Print label.
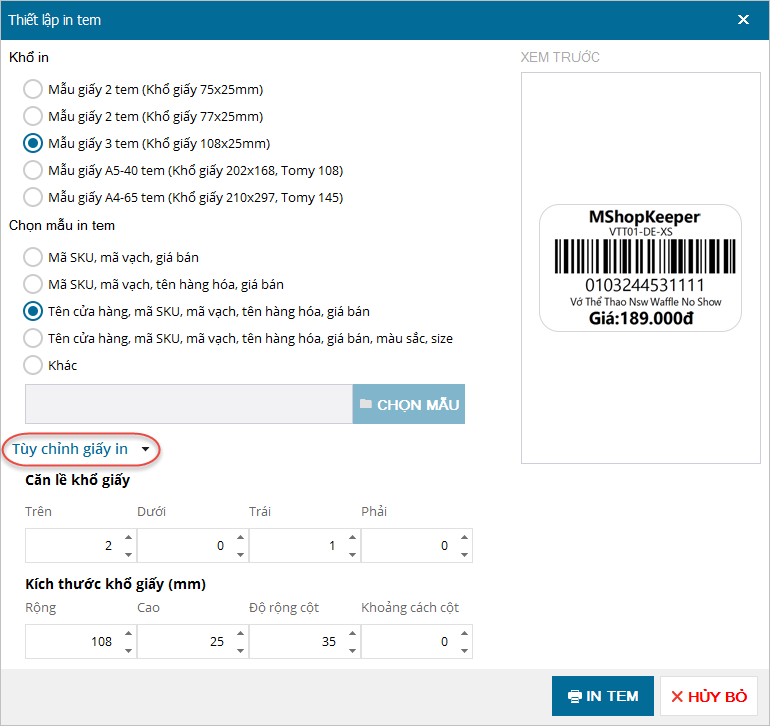
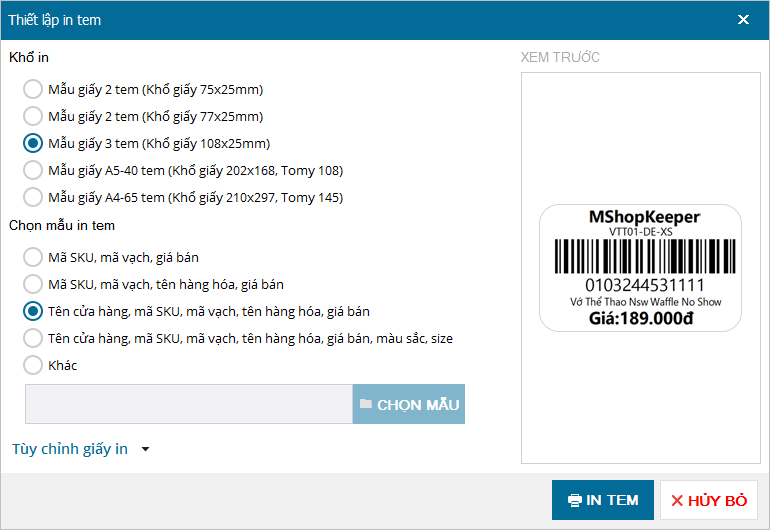
4. Set up label template: size and template.
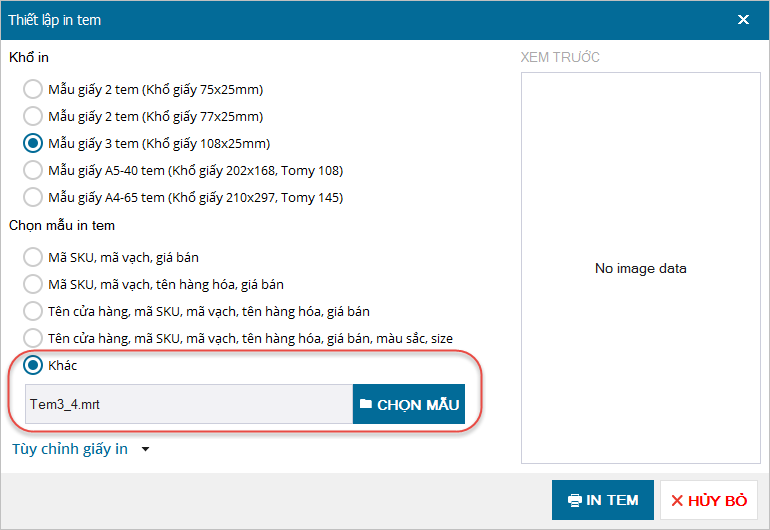
5. If the label template is available, click Other.
6. Click Select template to upload the label template.
7. Click Print label.
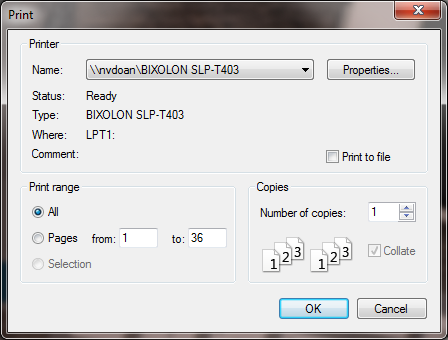
8. Preview the labels and then click Print
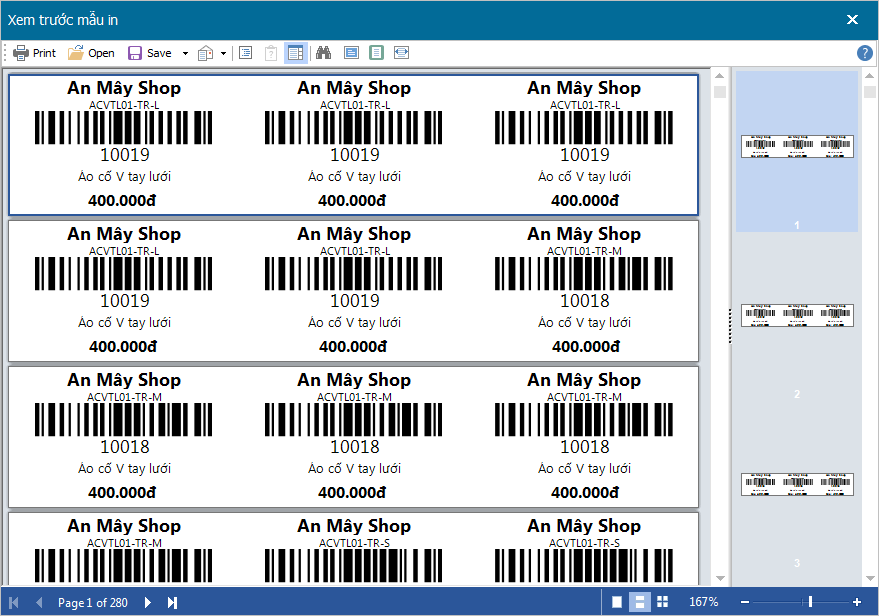
9. Select Label printer. Click OK.
2.2. Print labels for new models
Step 1: Create a list of items to print labels
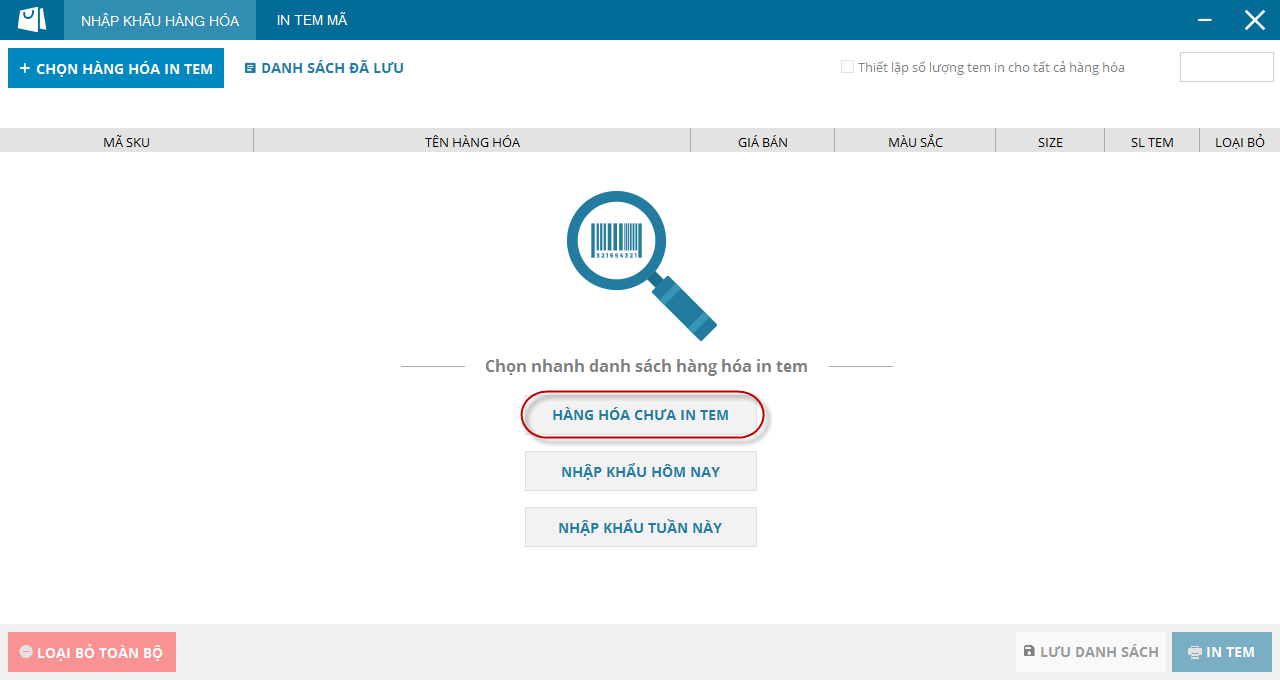
1. On Print label screen, click Items without printed labels.
2. The program shows list of items without printed labels.
Step 2: Print label
After creating the list, print labels as follows:.
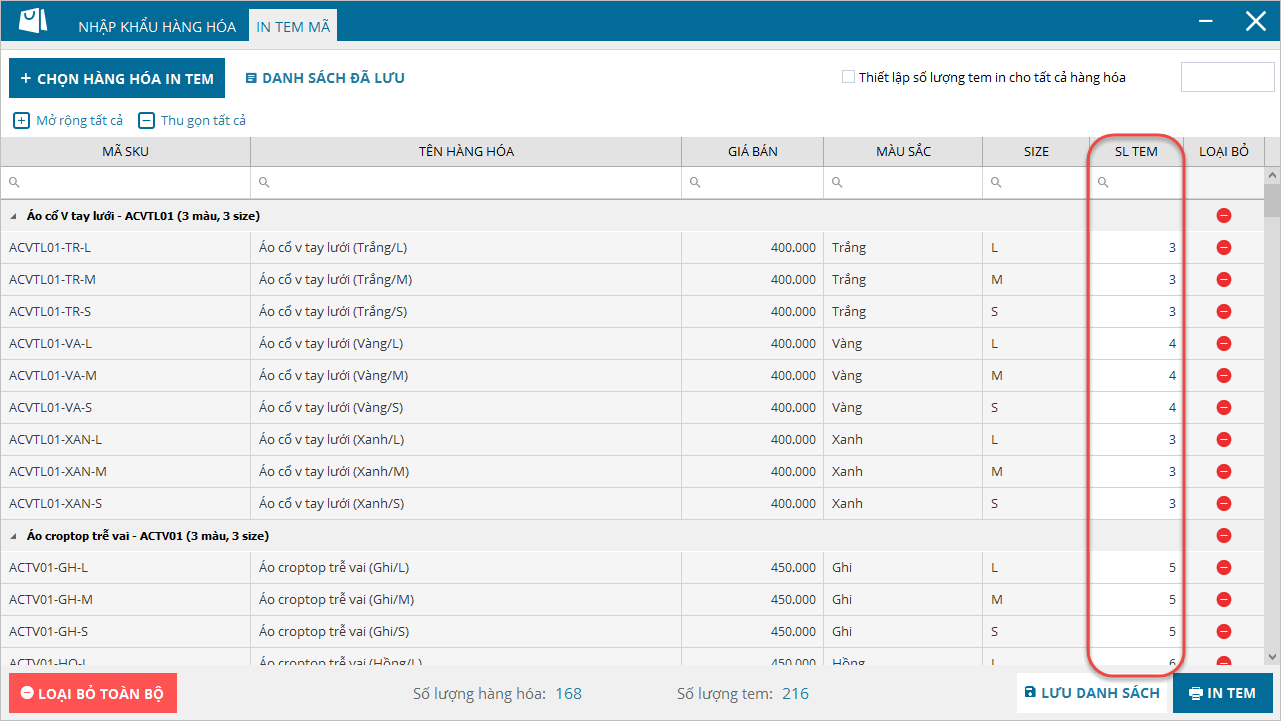
1. Enter the number of labels to be printed for each item.
2. Or check Set number of printed labels for all items and enter the number of labels to be printed for all items. (You can re-enter number of labels to be printed for certain items).
3. Click Print label.
4. Set up label template: size and template.
5. If the lable template is available, click Other.
6. Click Select template to upload the label template.
7. Click Print label.
8. Preview the labels and then click Print
9. Select Label printer. Click OK.
2.3. Print labels for current items
Step 1: Create a list of items to print labels
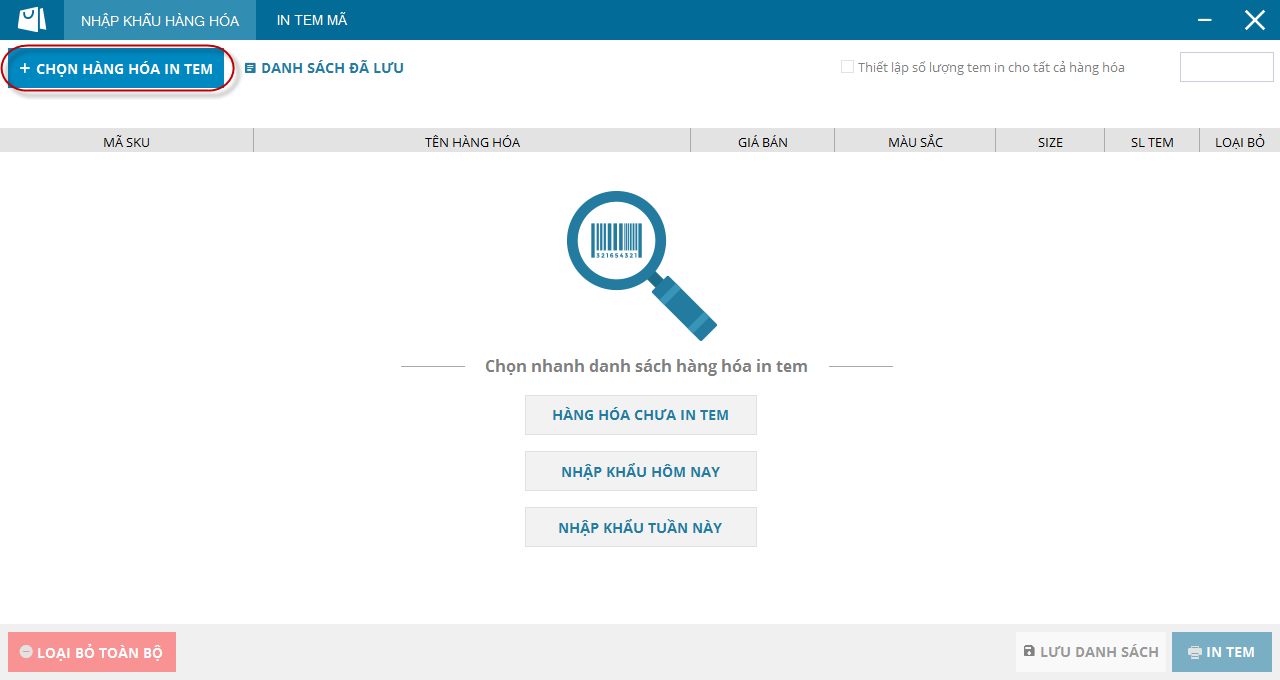
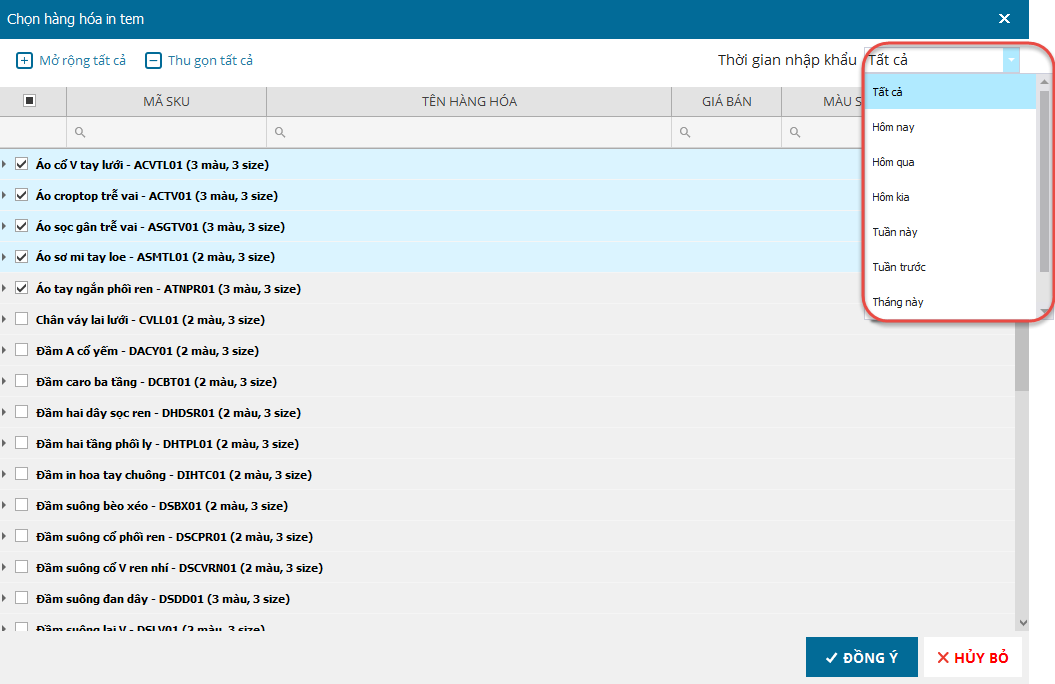
1. Click Select items to Print labels to select the models in the existing list.
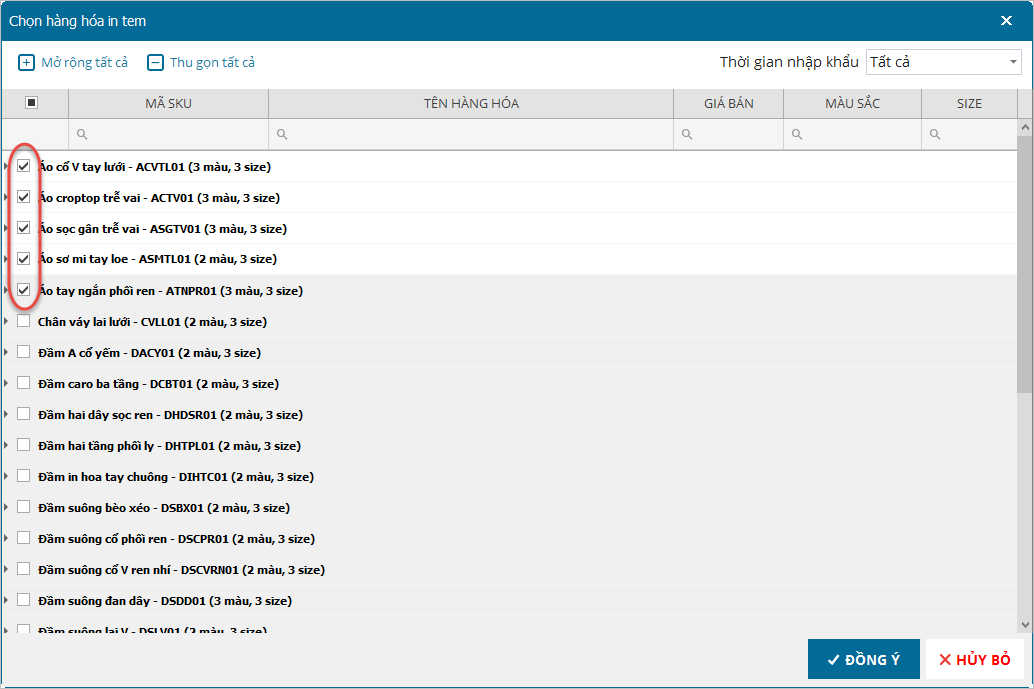
2. Check the items you want to print labels. You can click Shrink all to quickly select items by model.
3. You can filter list of items which you want to print labels by time of exporting, select time at Import time.
4. Click OK.
Step 2: Print label
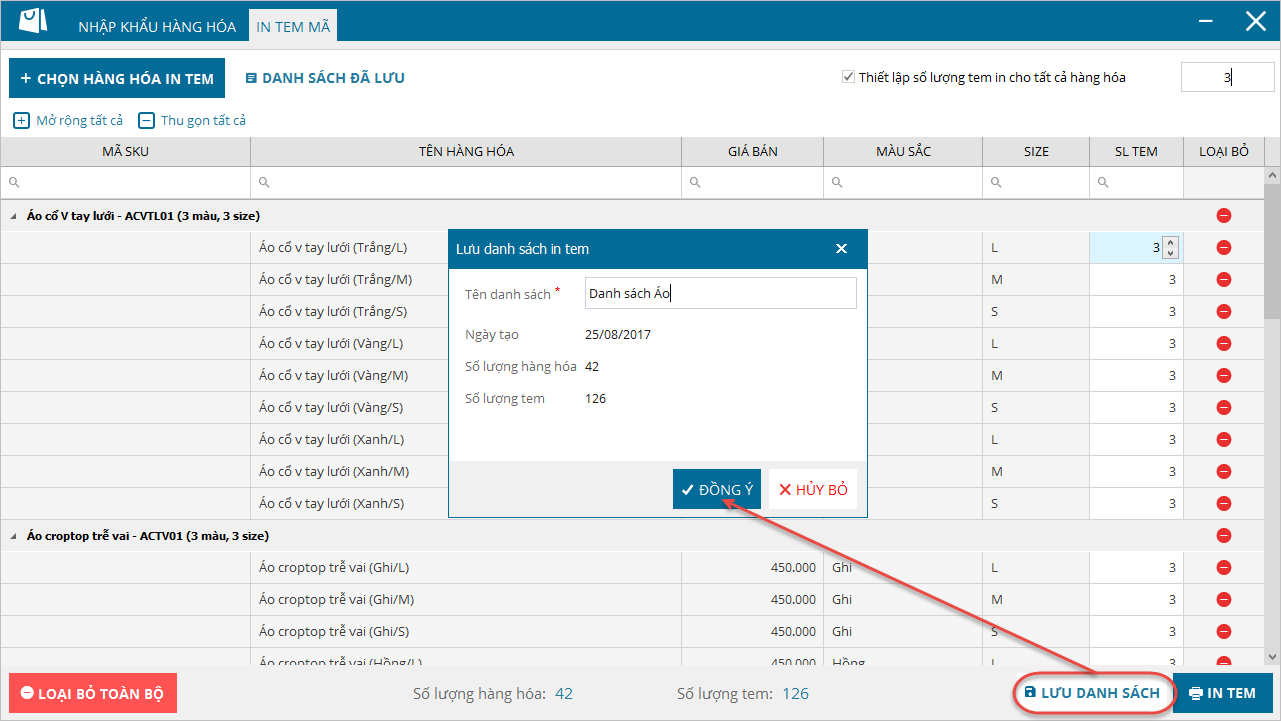
After creating the list, print labels as follows:1. Enter the number of labels to be printed for each item.
2. Or check Set number of printed labels for all items and enter the number of labels to be printed for all items. (You can re-enter number of labels to be printed for certain items).
3. Click Print label.
4. Set up label template: size and template.
5. If the label template is available, click Other.
6. Click Select template to upload the label template.
7. Click Print label.
8. Preview the labels and then click Print.


9. Select Label printer. Click OK.
Note:
- For some best-selling items, the shop ususally imports additional items. In this case, the shp can saves a list of these items for next times by clicking Save.
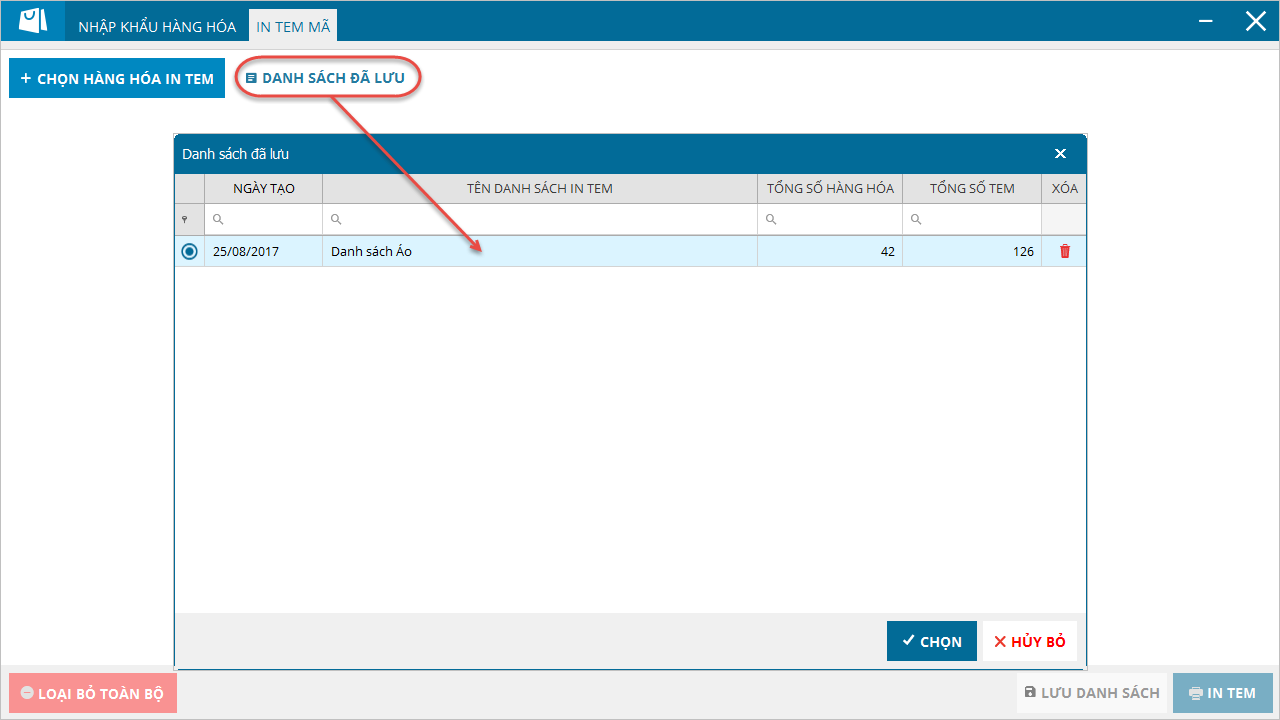
- When you want to print label, click Saved list and select the list of items to print labels.
3. Note
If the paper size in the shop is different from that in the software, you can customize it at Paper custom.